

 Rapid Ext JS (beta)


Using Computer Vision – How to Implement the Microsoft Azure Read REST API Using Sencha CMD and Ext JS
April 29, 2021
108 Views
If you are into AI algorithms,the Microsoft Azure Read REST API ( https://docs.microsoft.com/en-us/azure/cognitive-services/computer-vision/quickstarts-sdk/client-library?tabs=visual-studio&pivots=programming-language-rest-api ) service is one you need to get familiar with. What makes it interesting you ask? Well, it is an API that identifies and extracts any visible text, printed or handwritten, in an image or PDF file. Simply put, the Read REST API, identifies any words it finds in an image. It then returns results that show the confidence percentage of the found text.
The potential applications and use cases of the Read REST API are endless, so let’s take a look at how easy it is to create a JavaScript Ext JS application that applies this awesome API to scan images and extract texts. We will also show you some best practices for incorporating computer vision into your JavaScript applications that will keep you well in front of the competition.
Let’s get started with the Ext JS Javascript web framework!
Prerequisites
Before you start, there are some prerequisites to follow to access the API. You can follow the steps here to create a Computer Vision resource on Microsoft Azure to get your keys to access the API.
Starting with Sencha CMD
If you still don’t have Sencha CMD, you can download it for free here.
Once you have it installed you can make sure you have it properly installed and configured by running this command on terminal/shell:
$ sencha
If it returns the sencha cmd version, you are good to go. Here are more details on how to install, configure and use Sencha CMD, but this article will show all the important details.
Creating the application
The first thing you want to do is create your project structure. Sencha CMD can do this for you easily–all you need to do is run this command. If you have any questions, take a look at the bullet points below. They explain what everything in the command does and what you will need to change to personalize your application.
sencha -sdk /Users/fabio/sencha-sdks/ext-7.3.1/ generate app modern ReadTextImage ./read-text-image-extjs
/Users/fabio/sencha-sdks/ext-7.3.1/is where your Ext JS SDK folder is.- ReadTextImage is the name of our application and the namespace for our classes.
./read-text-image-extjsis the path for our project structure and the necessary files.- modern is the toolkit for our application.
Make sure when you run this command there is no error on the output. If there is no error, and everything runs correctly, you have successfully created your project structure. To be sure, however, let’s run our application with the initial structure. To do this, first navigate to your project folder:
$ cd read-text-image-extjs/
Then, run the command to open the server on a specific port:
$ sencha app watch
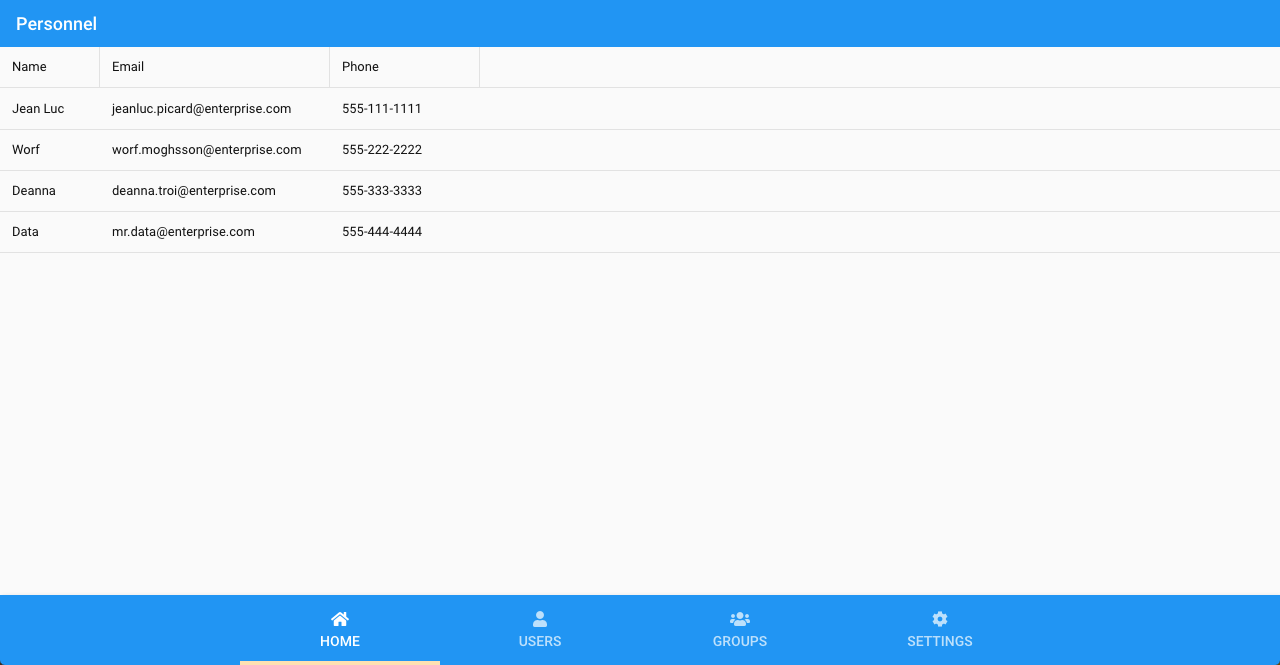
The output of this command will return the URL where your app is available. In this case, it is running on http://localhost:1841/. When you open it on your browser you will see a screen like this:
Cleaning up
Once you have your basic project running, you can clean it up by removing the files and components that you don’t need.
Use the command shown below to delete your unwanted files. While deleting, keep another terminal open and have the Sencha app running because it will update the application automatically:
$ rm app/model/* app/store/* app/view/main/List.*
With that done, let’s clean up our classes in app/view/main. Make sure your three classes look like this:
Main.js:
/**
 * This class is the main view for the application. It is specified in app.js as the
 * "mainView" property. That setting causes an instance of this class to be created and
 * added to the Viewport container.
 */
Ext.define('ReadTextImage.view.main.Main', {
    extend: 'Ext.Panel',
    xtype: 'app-main',
    controller: 'main',
    viewModel: 'main'
});
MainController.js:
/**
 * This class is the controller for the main view for the application. It is specified as
 * the "controller" of the Main view class.
 */
Ext.define('ReadTextImage.view.main.MainController', {
    extend: 'Ext.app.ViewController',
    alias: 'controller.main'
});
MainModel.js:
/**
 * This class is the view model for the Main view of the application.
 */
Ext.define('ReadTextImage.view.main.MainModel', {
    extend: 'Ext.app.ViewModel',
    alias: 'viewmodel.main',
    data: {}
});
After that, test the app again in your browser console to make sure it is running perfectly without errors. For now, it should show a panel without content.
Creating our Main View
Ok, let’s add some content to the panel. You need to create a container for the components form. Here we will add the fields for the user to fill with the API information and a URL for the image you want to scan. We will also include a preview of the image and a grid to display the results.
It’s very important to bind your components and link them with the View Model data which you will implement in the next steps. Also, you need to create a single event on your button to call the method that you create in your ViewController.
Here is the full Main View code:
Ext.define('ReadTextImage.view.main.Main', {
    extend: 'Ext.Container',
    xtype: 'app-main',
    controller: 'main',
    viewModel: 'main',
    layout: {
        type: 'hbox',
        align: 'stretch'
    },
    items: [{
        xtype: 'formpanel',
        reference: 'form',
        width: 500,
        defaultType: 'textfield',
        items: [{
            label: 'Endpoint (replace with your endpoint)',
            bind: '{endPoint}'
        },{
            label: 'Subs. Key',
            bind: '{key}'
        },{
            xtype: 'displayfield',
            label: 'API',
            bind: '{api}'
        },{
            label: 'File URL',
            bind: '{fileUrl}'
        },{
            // TODO: Implement preview for PDF
            xtype: 'image',
            height: 300,
            bind: {
                src: '{fileUrl}'
            }
        }],
        bbar: ['->', {
            text: 'Run',
            handler: 'onRunHandler'
        }]
    },{
        xtype: 'grid',
        flex: 1,
        title: 'Lines found',
        variableHeights: true,
        itemConfig: {
            collapsed: false,
            body: {
                tpl:
                    `<p>Words: <br>
                        <tpl for="words">
                            <p>{text} - confidence: {confidence * 100}%</p>
                        </tpl>
                    </p>`
            }
        },
        bind: '{lines}',
        columns: [{
            text: 'Line',
            dataIndex: 'text',
            flex: 1
        }]
    }]
});
Defining your Data in ViewModel
Now let’s define some data and connect a store for your view. With the store lines you will be able to save the response that comes from the API and display it in a table:
Ext.define('ReadTextImage.view.main.MainModel', {
    extend: 'Ext.app.ViewModel',
    alias: 'viewmodel.main',
    data: {
        endPoint: 'https://fabio-test.cognitiveservices.azure.com', // replace with your endpoint
        api: 'vision/v3.2/read/analyze',
        key: 'yourKeyHere',
        fileUrl: 'https://upload.wikimedia.org/wikipedia/commons/thumb/a/af/Atomist_quote_from_Democritus.png/338px-Atomist_quote_from_Democritus.png'
    },
    stores: {
        lines: {
            fields: ['text', 'words']
        }
    }
});
Understanding the Logic for the Calls
The most important code, where you call the API, is in the MainController. The API must be called in two steps:
The first step tells the API what file it should process. The second step confirms the file was processed and is ready. You will need to repeat this second call because sometimes, depending on the size and complexity of the file, the API needs more time to scan. For each request, the API returns the status of the operation. As soon you receive the success status you can stop calling the API and display the result.
Implementing the Logic on our ViewController
With that done, you can get started on the ViewController logic. Firstly, you need to define the method onRunHandler. This determines the method called when the user clicks on the Run button you defined in the MainView.
Mask the button while your operation is processing. The method calls the first request, sending your key to access the API. Once you receive the success callback on the first API call, you send the second request, your getReadResult method:
onRunHandler() {
    const {
        endPoint,
        api,
        key,
        fileUrl
    } = this.getViewModel().getData();

    this.lookup('form').mask('Running...');

    Ext.Ajax.request({
        url: `${endPoint}/${api}`,
        headers: {
            'Ocp-Apim-Subscription-Key': key // authentication
        },
        jsonData: {
            url: fileUrl
        },
        success: response => {
            this.getReadResult(response.getResponseHeader('Operation-Location'), key);
        }
    });
}
With that done, the next step is to implement the method for the second call to the API to check if the process is ready. Here we check the response. If the response is success, remove the loading mask and insert the response data from the API to the store. This will show the final result in the grid you created in your MainView. If the result is not ready, the method will call itself again every second until the API sends the final result:
getReadResult(url, key) {
    Ext.Ajax.request({
        url,
        headers: {
            'Ocp-Apim-Subscription-Key': key
        },
        success: response => {
            const result = Ext.decode(response.responseText);

            // if process is not ready
            if (result.status !== 'succeeded') {
                // try again after 1 sec
                Ext.defer(() => {
                    this.getReadResult(url, key);
                }, 1000);

                return;
            }

            this.lookup('form').unmask();

            // populate the store to show result words on grid
            // simplify only to read page 1(array position 0) for images.
            // TODO: in case of pdf, can be verified each page of the result
            this.getViewModel().getStore('lines').setData(result.analyzeResult.readResults[0].lines);
        }
    });
}
Here is the final MainController code:
Ext.define('ReadTextImage.view.main.MainController', {
    extend: 'Ext.app.ViewController',
    alias: 'controller.main',

    onRunHandler() {
        const {
            endPoint,
            api,
            key,
            fileUrl
        } = this.getViewModel().getData();

        this.lookup('form').mask('Running...');

        Ext.Ajax.request({
            url: `${endPoint}/${api}`,
            headers: {
                'Ocp-Apim-Subscription-Key': key // authentication
            },
            jsonData: {
                url: fileUrl
            },
            success: response => {
                this.getReadResult(response.getResponseHeader('Operation-Location'), key);
            }
        });
    },

    getReadResult(url, key) {
        Ext.Ajax.request({
            url,
            headers: {
                'Ocp-Apim-Subscription-Key': key
            },
            success: response => {
                const result = Ext.decode(response.responseText);

                // if process is not ready
                if (result.status !== 'succeeded') {
                    // try again after 1 sec
                    Ext.defer(() => {
                        this.getReadResult(url, key);
                    }, 1000);

                    return;
                }

                this.lookup('form').unmask();

                // populate the store to show result words on grid
                // simplify only to read page 1(array position 0) for images.
                // TODO: in case of pdf, can be verified each page of the result
                this.getViewModel().getStore('lines').setData(result.analyzeResult.readResults[0].lines);
            }
        });
    }
});
Running the Application
Once you have finished your code and saved all changes, access the app on http://localhost:1841/ to test.
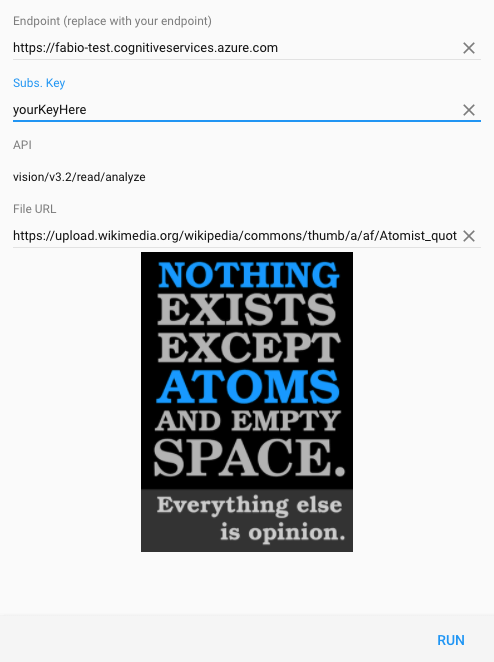
On the left side, you can see the form with your fields. Make sure to edit the Endpoint URL with the Endpoint URL you created on Azure. You also need to paste your own API Key into the proper field.
You will see a preview of the image. You can change the image URL to that of any other image available on the web and the preview will update. After you fill out the form, click on the Run button :
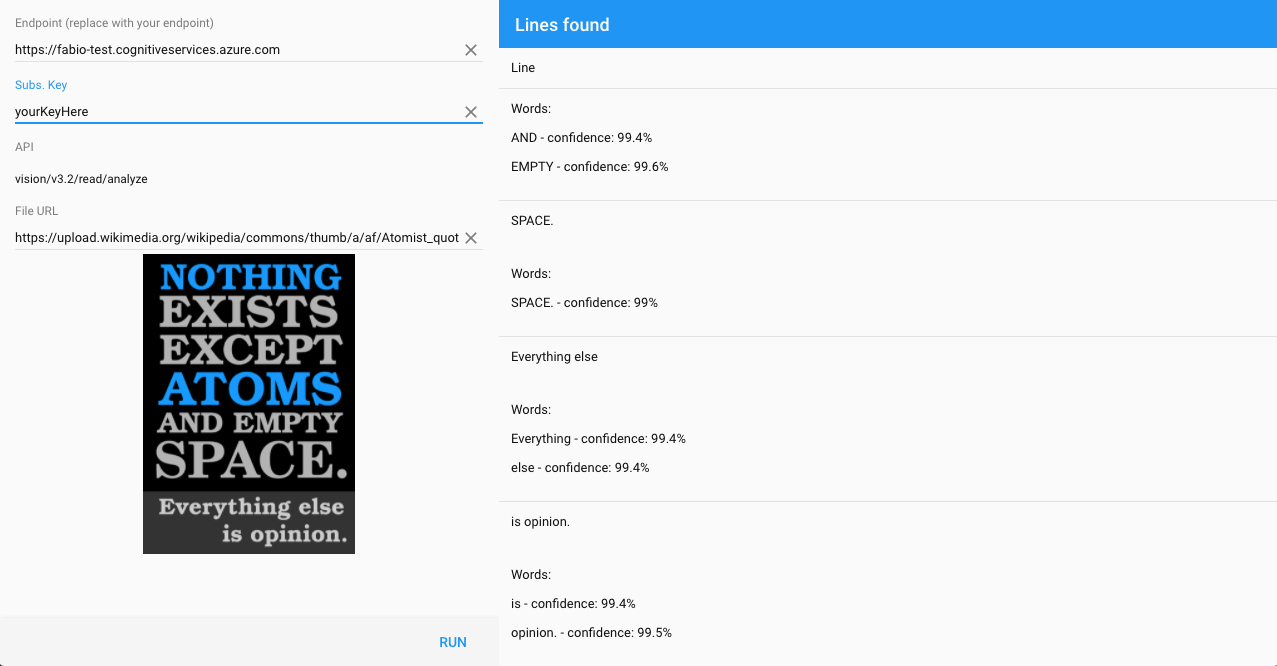
After a few seconds, the result will display in the grid on the right side. Each row of the grid shows a line of text found in the image. The grid also displays the details and confidence percentage for each word in the line:

Here is the final application:
What’s next?
Now you can implement the UI to preview a PDF and read all pages of the PDF and identify printed and handwritten words.
Click here to see the source code in the repository.
What's your reaction?
 0
0

 0
0

Latest Content
Discover the Top 07 Architecture Patterns used in Modern Enterprise Software Development
Developing software without an architecture pattern may have been an option back then. However, that’s…
April 11, 2024

JavaScript Design Patterns: A Hands-On Guide with Real-world Examples
As a web developer, you know how popular JavaScript is in the web app development…
March 26, 2024

Virtual JS Days 2024のハイライト
2024年2月20日~22日、第3回目となる「Virtual JavaScript Days」が開催されました。JavaScript の幅広いトピックを採り上げた数多くのセッションを実施。その内容は、Senchaの最新製品、ReExt、Rapid Ext JSまで多岐にわたり、JavaScriptの最新のサンプルも含まれます。 このカンファレンスでは多くのトピックをカバーしています。Senchaでセールスエンジニアを務めるMarc Gusmano氏は、注目すべきセッションを主催しました。Marc は Sencha の最新製品「ReExt」について、詳細なプレゼンテーションを実施。その機能とメリットを、参加者に理解してもらうべく詳細に説明しました。 カンファレンスは、Senchaのジェネラルマネージャを務めるStephen Strake氏によるキーノートでスタートしました。キーノートでは、会社の将来のビジョンについての洞察を共有しています。世界中から JavaScript 開発者、エンジニア、愛好家が集まるとてもエキサイティングなイベントとなりました。これは、JavaScript…
March 25, 2024


