

 Rapid Ext JS (beta)


Testing Enterprise Applications with Selenium and HTML5 Robot
August 20, 2014
116 Views
Guest Blog Post
 The need for browser-based test automation is difficult to dismiss. Enterprises are reducing their IT staff, but they still need to know that the most recent round of software upgrades did not break their mission-critical web-based applications in Internet Explorer 7 and Firefox version 19. Manually making these determinations with a staff of humans is time-consuming, error-prone, costly, and ultimately unnecessary.
Many of these companies use Selenium, which has become the enterprise standard for test automation because of its ease of use and widespread adoption. but its vision of static DOM and form-based web applications is outdated. Modern web application frameworks like Ext JS and Sencha Touch dynamically alter the DOM as the user interacts with the application, which creates headaches for Selenium.
HTML5 Robot was created to ease the difficulty in using Selenium with HTML5 technologies. HTML5 Robot extends Selenium capabilities by adding specific component lookup and interaction support for HTML5 js frameworks like Ext JS 4, Ext JS 5, and Sencha Touch 2. It is also based on a series of best practices for how to reliably look up and interact with those components in enterprise web applications. HTML5 Robot can be used as a Java framework for writing and managing test suites, or as a Java library that can be included in your own existing project.
A Javascript Web Framework may help developers in testing applications with selenium and HTML5 robot because it lets you analyze your application code for issues, such as overnesting of components, a number of layout runs and helps improve your application performance.
How do I Understand HTML5 and the HTML DOM in Memory?
For many years, HTML pages were static resources delivered by a web server and displayed in the web browser without modification. When you “View the Source” of a page, what you see is what you get. A <select /> component is a <select /> component. By 2008 though, AJAX and JavaScript frameworks became popular and web pages became less static. DOM manipulation became common with user interactions, and viewing the page source could not give you the full story. This is because you can dynamically add <option /> components to the <select /> component. This modification to the <select /> component can’t be seen in the page source; in order to see it, you have to view the HTML DOM as it exists in the browser’s memory. In a browser like Chrome, you can see this by right-clicking on the page and selecting “Inspect Element”.
| HTML by Viewing Source | HTML by Inspection (Memory) |
<select name="someName"> </select> |
<select name="someName">
        <option value="volvo"> Volvo</option>
        <option value="saab"> Saab</option>
        <option value="opel"> Opel</option>
        <option value="audi"> Audi</option>
</select>
|
Frameworks like Sencha Touch and Ext JS go beyond this simple example though. In the case of Ext JS 5, a <select /> component (also known as a drop-down or a combo box) is not even a <select /> component. If you can type into the combo box, the underlying HTML component is an input. However if you cannot type text into it, the underlying HTML component is a link (the “a” tag). For example, consider the Ext JS 5 combo box when you can type text into it:

Ext JS 5
{
         fieldLabel: 'Select a single state',
         displayField: 'state',
         anchor: '-15',
         labelWidth: 130,
         store: {
                    type: 'states'
         },
         minChars: 0,
         queryMode: 'local',
         typeAhead: true
}
Generated HTML
<div id=“combobox-3234...”>
        <label id=“combobox-3234...”>
                    Select a single state
        </label>
        <div id=“combobox-3234...”>
                <input id=“combobox-3234...” />
                <div id=“combobox-3234...”
                                 class=“x-form-arrow-trigger” />
        </div>
</div>
Notice that the ID attributes of every HTML tag in the generated HTML contain a number. This is an indication that these values are dynamically generated. For Ext JS 5, almost every ID you encounter will be dynamically generated, with very few exceptions. This is why it is not a good practice to rely on these attributes.
There are a number of effective ways to reliably locate Ext JS and Sencha Touch generated components. These methods though depend on the component itself. The effective methods are as follows in order of preference:
- By text on the component, which only works when the component has text in it like a link or a button
- By form label, which only works when the component is in a form with an associated label
- By occurrence, which works in all cases but requires you to do something such as “find the 3rd combo box in the page”
For example, consider the Ext JS 5 Combo Box, which you can obtain by its associated form label. The only way this location expression would fail is if the text on that label were to change; this is a reasonably safe expectation given that our other options involve attributes that are dynamic the next time the page is loaded.
For example consider an XPath statement that does the following:
- Finds an input acting in the role of a combo box
- …which is a part of a div that contains a label with the text of “Select a single state”
- .. and finds the div that acts as the combo box button, as identified by the class “x-form-arrow-trigger”

The down arrow in the red box is the element that would be selected
XPath (returns and spaces added for readability)
//input[contains(@role, 'combobox')]
    /ancestor::div
    /descendant::label[contains(.,'Select a single state')]
    /ancestor::div[1]
    /descendant::div[contains(@class, 'x-form-arrow-trigger')]
This also shows that you have to understand what you’re trying to interact with. The way in which you interact with a Combo Box is different from how you’d interact with a Grid in Ext JS 5. These methods of interaction revolve around the different interactable parts of a component and how to locate them. This is why HTML5 Robot has defined methods for locating components and their interactable subcomponents (See Java – Locating Components).
For example, in a Java based HTML5 Robot test that included the Ext JS 5 support class, one could get the XPath for the Ext JS 5 combo box button by using the following:
String xpath = findComboBoxButtonByFormLabel("Select a single state");
This has been done for every conceivable point of interaction for every component in general HTML, Sencha Touch, and multiple versions of Ext JS. This is a huge timesaver when writing tests, and saves even more time in the long run since these tests are fundamentally more maintainable and less likely to break.
How do I test an Enterprise App?
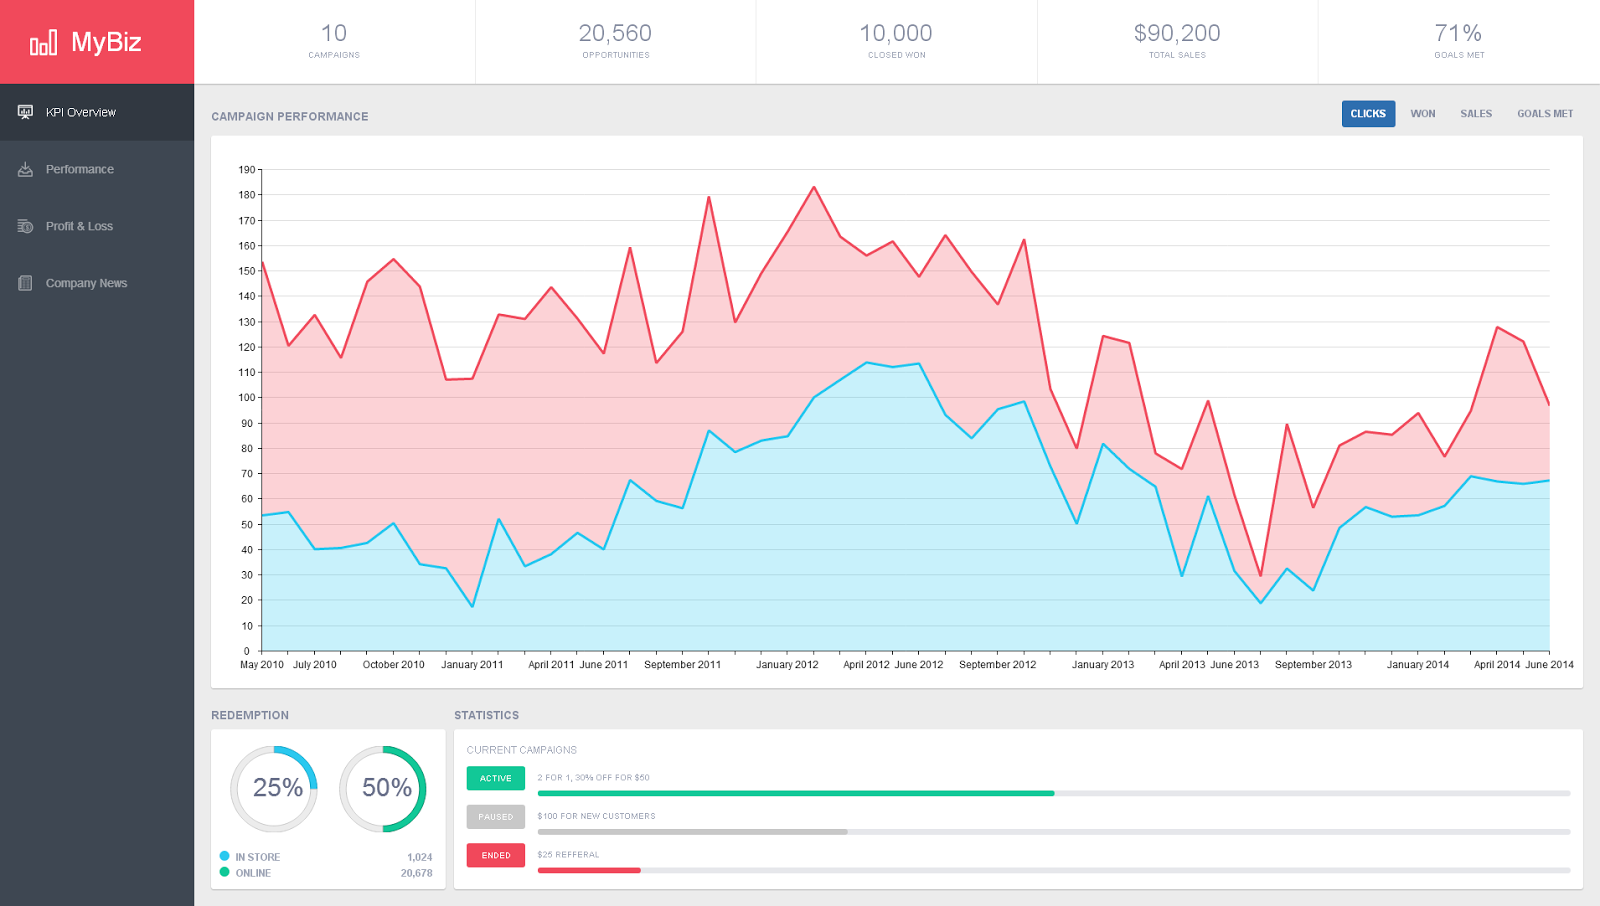
Now that we have a solid understanding of what the DOM looks like in a modern web application, let’s take a look at an example. While HTML5 Robot usually tests against the Kitchen Sink demo, Ext JS 5 ships with an awesome new example called Executive Dashboard which simulates an enterprise application. You can also watch this video to learn how to install HTML5 Robot locally and get it running.
The first step in testing an application is to identify the components with which you want to interact, and the components which contain data that you want to verify.
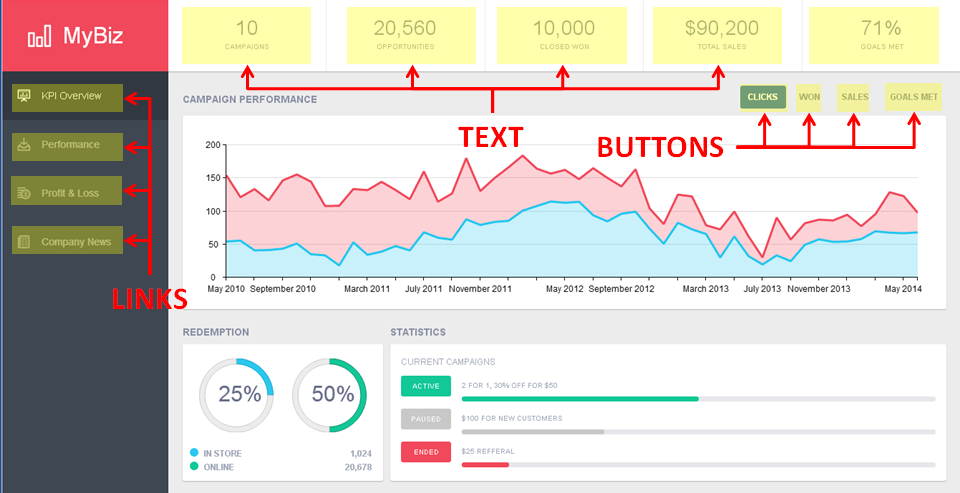
The “KPI Overview” contains links, buttons, text, and charts. The charts are based on a canvas, so if you were to interact with them, the methods would be very different than the ones used for the links, buttons, and text. The points of interaction have been highlighted in the image above.
Our first step is to create a class to retrieve the interactive components, so we’ll start by creating a Model class that extends BaseModel:
import static com.appfoundation.automation.util.ExtJs5XPathUtils.*;
import com.appfoundation.automation.framework.BaseModel;

public class ExtJs5ExecutiveDashboardModel extends BaseModel {
...
ExtJs5ExecutiveDashboardModel.java
The next step is to define some constants that do the XPath lookups in the Model, which will be needed later:
...
// Left menu links
        public static final String KPI_LINK_XPATH =
                findLinkByText("KPI Overview");
        public static final String PERFORMANCE_LINK_XPATH =
                findLinkByText("Performance");
        public static final String PROFIT_N_LOSS_XPATH =
                findLinkByText("Profit & Loss");
        public static final String COMPANY_NEWS_XPATH =
                findLinkByText("Company News");

        // KPI Overview
        public static final String KPI_CLICKS_XPATH = findButtonByText("CLICKS");
        public static final String KPI_WON_XPATH = findButtonByText("WON");
        public static final String KPI_SALES_XPATH = findButtonByText("SALES");
        public static final String KPI_GOALS = findButtonByText("GOALS MET");

...
ExtJs5ExecutiveDashboardModel.java
Once the XPath lookups are defined, the next step is to define methods for doing Selenium WebElement lookups for these components.
...
public ExtJs5ExecutiveDashboardModel(BaseSeleniumTest test) {
                super(test);
        }

        public WebElement findKpiLink() {
                return this.find(KPI_LINK_XPATH);
        }

        public WebElement findPeformanceLink() {
                return this.find(PERFORMANCE_LINK_XPATH);
        }

...
ExtJs5ExecutiveDashboardModel.java
The next step is to write the Base Test Class, where the purpose is to define the basics of test operations as they are likely to work in all browsers. Later, you will define browser specific test implementations in other classes. When running the test methods of the class out of an IDE like Eclipse, the tests will default to running in Chrome. The Base Test Class needs to extend the BaseSeleniumTest, which provides access to helpful utilities for simplifying typically complicated operations, such as dragging and dropping one WebElement onto another. It also instantiates the BaseModel as well as handles the actual test execution.
package com.appfoundation.automation.example;

import org.junit.Test;

import com.appfoundation.automation.example.model.ExtJs5ExecutiveDashboardModel;
import com.appfoundation.automation.framework.BaseSeleniumTest;

import static org.hamcrest.MatcherAssert.*;
import static org.hamcrest.Matchers.*;

public class ExtJs5ExecutiveDashboardTestBase extends BaseSeleniumTest {

        private String URL =
                "http://dev.sencha.com/extjs/5.0.0/examples/executive-dashboard/index.html";
        private ExtJs5ExecutiveDashboardModel model;

        public ExtJs5ExecutiveDashboardTestBase() {
                this.model = new ExtJs5ExecutiveDashboardModel(this);
        }

@Test
public void testKpiOverview() throws Exception {
                // Code goes here
}
ExtJs5ExecutiveDashboardTestBase.java
Notice that the test is JUnit-based, and as a preference I like to use Hamcrest in order to handle assertions. I find that statements like “Assert that X is Y” using Hamcrest are easier to read than the JUnit asserts like “assert that Y is expected from X”. You could use the standard JUnit “assertEquals” in place of the “assertThat” statements.
In any test, the first action is to open the URL to be tested. Another aspect of any test is that you need to wait on something that is deterministic to know that the application is in a state where you can interact with it. A good way to do this is to wait for some element on the page to be clickable, in this case waiting on the “KPI Overview” link to be clickable will work.
Open the URL sized for full screen, and wait for the “KPI Overview” link to be clickable
...

// Load the URL of the page to test
this.openUrlFullScreen(URL + "#!kpi/clicks");

// wait for the first menu item (a link) to be clickable
this.waitToBeClickable(ExtJs5ExecutiveDashboardModel.KPI_LINK_XPATH);
this.outputScreenShot();

...
Test KPI Overview – ExtJs5ExecutiveDashboardTestBase.java
At this point, it is a good idea to start verifying some of the expected displayed data. For the KPI Overview, you can assert the expectations for the values at the top of the page listed for Campaigns, Opportunities, Closed, Total Sales, and Goals.
Verify the expected data
...

// verify general data on the screen
assertThat(model.findBody().getText(), containsString("10nCAMPAIGNS"));
assertThat(model.findBody().getText(), containsString("20,560nOPPORTUNITIES"));
assertThat(model.findBody().getText(), containsString("10,000nCLOSED WON"));
assertThat(model.findBody().getText(), containsString("$90,200nTOTAL SALES"));
assertThat(model.findBody().getText(), containsString("71%nGOALS MET"));


...
Test KPI Overview – ExtJs5ExecutiveDashboardTestBase.java
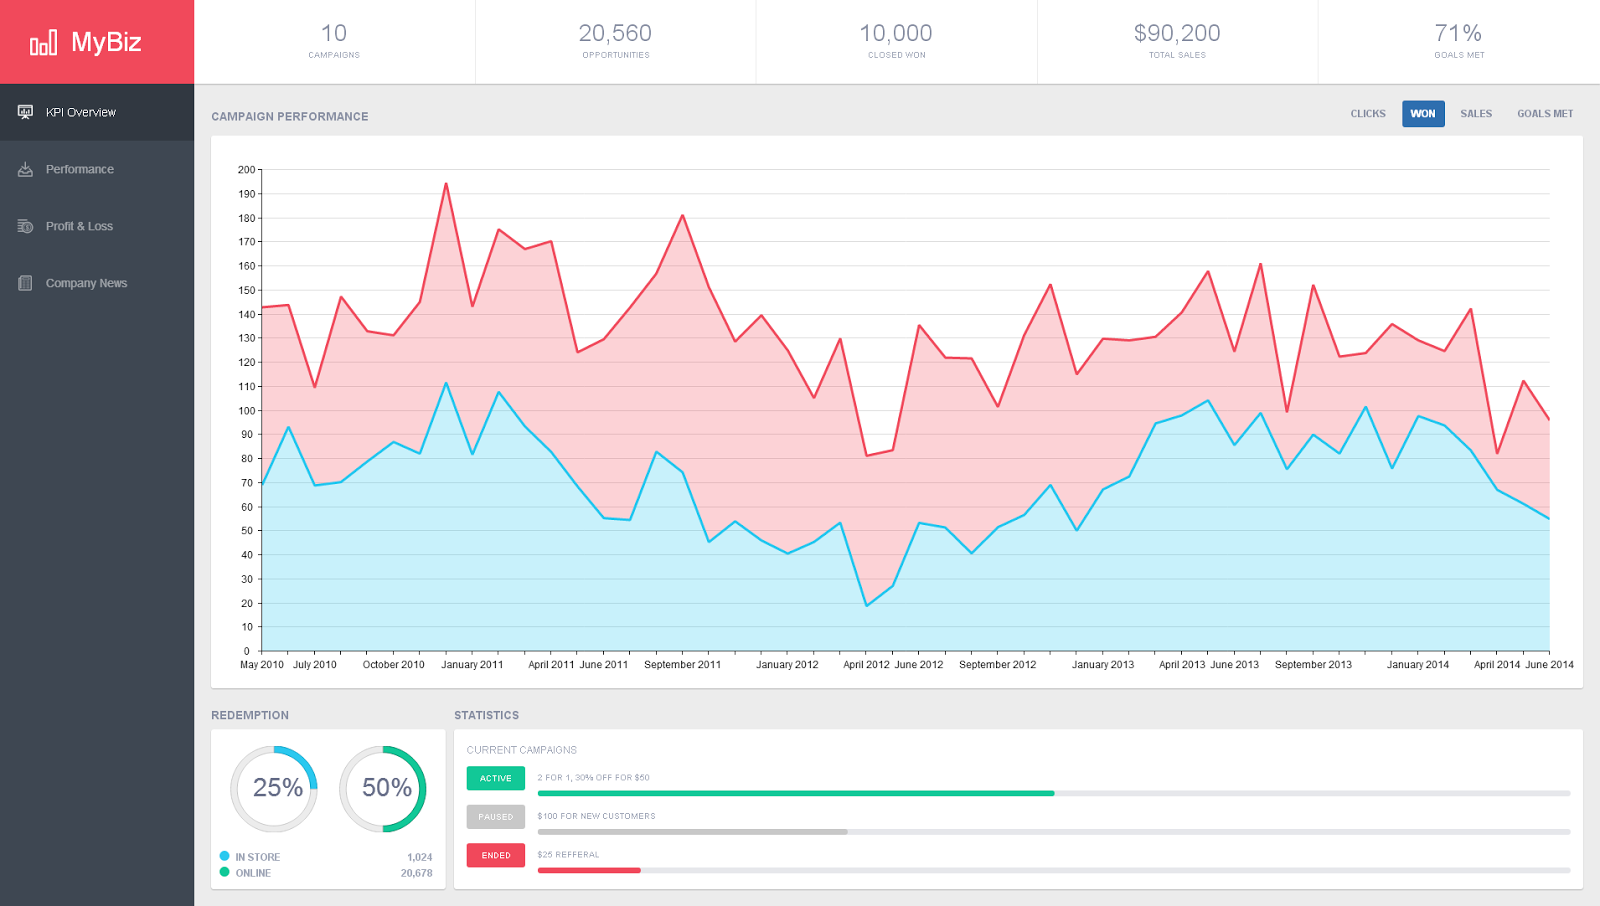
We can then begin clicking on the options available to us, starting with the “WON” button.
Click the “WON” button and wait for “CLICKS” button to be clickable
...

// Select the WON button, wait for the selection to complete
model.findKpiWonButton().click();
this.waitToBeClickable(ExtJs5ExecutiveDashboardModel.KPI_CLICKS_XPATH);
this.outputScreenShot();


...
Test KPI Overview – ExtJs5ExecutiveDashboardTestBase.java
How do I go about Running the Tests?
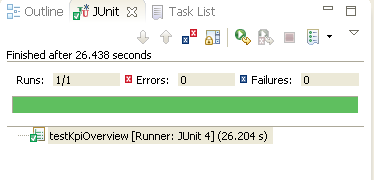
In an IDE like Eclipse, you can right-click on the test method declaration in the code, select “Run As -> JUnit Test”. The result is that the test method will be executed against the default browser, which is Chrome. If the logging settings are set to Debug, you will also get console output specifying the XPath that was used for component locations.
JUnit – Test KPI Overview – ExtJs5ExecutiveDashboardTestBase.java
Testing Console Output
...
12:45:22,273 DEBUG [ExtJs5XPathUtils] findButtonByText: //a[contains(@class,'x-btn') and contains(.,'CLICKS')]
12:45:22,273 DEBUG [ExtJs5XPathUtils] findButtonByText: //a[contains(@class,'x-btn') and contains(.,'WON')]
12:45:22,289 DEBUG [ExtJs5XPathUtils] findButtonByText: //a[contains(@class,'x-btn') and contains(.,'SALES')]
...
Console Output – Test KPI Overview – ExtJs5ExecutiveDashboardTestBase.java
Am I able to do testing in Other Browsers?
HTML5 Robot uses browser-specific test classes that extend a base class, which in this example is ExtJs5ExecutiveDashboardTestBase. The reason for this is to allow for browser specific test implementations, which are sometimes necessary when dealing with operations like file upload that are generally browser specific. In order to do a browser-specific test, there are annotations that must be included in the test.
For example if you wanted to run the test in Firefox:
Firefox
package com.appfoundation.automation.example.test;

import com.appfoundation.automation.example.ExtJs5ExecutiveDashboardTestBase;
import com.appfoundation.automation.framework.Browser;
import com.appfoundation.automation.framework.BrowserType;

@BrowserType(value = Browser.FIREFOX)
public class ExtJs5ExecutiveDashboardFirefoxTest extends ExtJs5ExecutiveDashboardTestBase {

}
Right-clicking on any of these test classes in the Eclipse IDE and selecting “Run As -> JUnit Test” will run the test in the appropriate browser, as specified in the class-level annotation. An important point is that the exact browser to be used is the one that sits on the computer you are using. If you want to run your tests against Internet Explorer 8, the machine running the test must have Internet Explorer 8 installed.
Ready to get started building apps using some of the best javascript frameworks?
The future is HTML5, and Sencha is leading the way to that future with Ext JS 5 and Sencha Touch 2. Selenium is great, but it has a hard time keeping up with the amazing things HTML5 applications can do. Even being an expert in HTML DOM component location, one still has to define all of the possible methods for interacting with those components in a specific technology like Ext JS 5. HTML5 Robot not only provides the ability to interact with Ext JS 5 out-of-the-box, it provides the enterprise with a series of best practices for quickly creating maintainable and reliable browser-based tests through Selenium. It also comes with support for the major browser drivers, including Chrome, Firefox, Internet Explorer, and Safari. This support includes advanced behavior such as taking screenshots, drag and drop, and conditional wait expressions to handle the highly asynchronous world of HTML5. For more information about integrating HTML5 Robot into your project, check out our video.
What's your reaction?
 0
0

 0
0

Latest Content

Discover the Top 07 Architecture Patterns used in Modern Enterprise Software Development
Developing software without an architecture pattern may have been an option back then. However, that’s…
April 11, 2024

JavaScript Design Patterns: A Hands-On Guide with Real-world Examples
As a web developer, you know how popular JavaScript is in the web app development…
March 26, 2024

Virtual JS Days 2024のハイライト
2024年2月20日~22日、第3回目となる「Virtual JavaScript Days」が開催されました。JavaScript の幅広いトピックを採り上げた数多くのセッションを実施。その内容は、Senchaの最新製品、ReExt、Rapid Ext JSまで多岐にわたり、JavaScriptの最新のサンプルも含まれます。 このカンファレンスでは多くのトピックをカバーしています。Senchaでセールスエンジニアを務めるMarc Gusmano氏は、注目すべきセッションを主催しました。Marc は Sencha の最新製品「ReExt」について、詳細なプレゼンテーションを実施。その機能とメリットを、参加者に理解してもらうべく詳細に説明しました。 カンファレンスは、Senchaのジェネラルマネージャを務めるStephen Strake氏によるキーノートでスタートしました。キーノートでは、会社の将来のビジョンについての洞察を共有しています。世界中から JavaScript 開発者、エンジニア、愛好家が集まるとてもエキサイティングなイベントとなりました。これは、JavaScript…
March 25, 2024


