


 Ask Sencha AI
Using Multiple Browser Instances with Sencha Test
December 20, 2016
1453 Views
Get a summary of this article:

Automation engineers often need two or more browser instances open when writing end-to-end tests. This allows them to test concurrency aspects of web applications such as business logic integrity involving multi-user scenarios. Sencha Test 2.0, along with the new WebDriver scenario type, introduces the ability to use multiple browser contexts in the same test.
A context is the engine behind the Sencha Test API that abstracts most parts of the environment in which the test is running. This allows the use of the Sencha Test API in both “in-browser” and WebDriver scenarios. In the latter, the context is the object that interacts with the underlying WebdriverIO API.
The user doesn’t need to worry about the existence and lifecycle of the default context because it’s abstracted by the Sencha Test 2.0 API.
// in case you're curious, here's the default
// context doing the magic under the hood
ST.defaultContext;

// and here's the WebdriverIO instance that
// controls the browser in WebDriver scenarios
ST.defaultContext.driver;
It’s easy to create additional contexts on the fly if the user needs a second browser instance. Users will need to use the ST.context.WebDriver class for WebDriver contexts. This class only needs a driver configuration and a URL. You can leverage the configuration stored in ST.options.driverConfig to create a browser instance with an identical configuration to the one created automatically by Sencha Test.
In the example below, we’ll execute the same search using Google US and Google Brazil.
For additional contexts, the user is responsible for controlling their lifecycles by calling the .init() and .onStop() methods. Both of these methods return asynchronous promises that will resolve at the appropriate time. One of the powerful features in Sencha Test 2.0 is the ability to switch contexts in order to benefit from the Sencha Test Futures API. This provides automation engineers with total control over the ordering of interactions.
describe("Multibrowser.js", function() {

    var google, googleBR;

    beforeAll((done) => {
        // the initial URL is set to http://google.com
        // in the scenario configuration
        google = ST.defaultContext;

        googleBR = new ST.context.WebDriver({
            // use the same driver configuration
            driverConfig: ST.options.driverConfig,
            // only with a different initial URL
            subjectUrl: 'http://www.google.com.br'
        });
        // the user is responsible for the context initialization
        googleBR.init().then(done);
    });

    afterEach(() => {
        // restore default context
        ST.defaultContext = google;
    });

    it("searches Sencha in two different sites", function(done) {
        // default context is google.com
        ST.element('input[title="Search"]')
            .type('sencha')
            .and(() => {
                // we only searched at google.com so far
                debugger;
            });

        // now switch to google.com.br and still have all
        // commands executed in order
        ST.defaultContext = googleBR;
        ST.element('input[title="Pesquisar"]')
            .type('sencha')
            .and(() => {
                // now we searched at both sites
                debugger;
                done();
            });
    // large timeout so the user has plenty of time
    // to pause in the debugger statements and enjoy
    // the view
    }, 5 * 60 * 1000);


    afterAll((done) => {
        // terminating the context closes the driver connection
        // to avoid stale browser instances
        googleBR.onStop(done);
    });

});
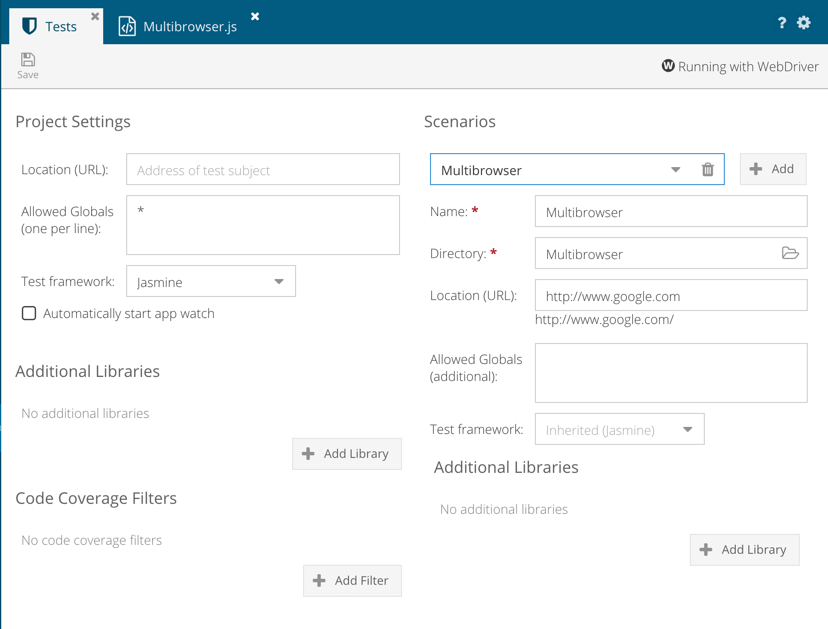
To use this example, simply create a WebDriver scenario in your workspace as shown below. Then, add a Jasmine test suite with the code shown in the above code example.
Was this article useful? Please post your comments and questions in the Sencha Test Forum. Be sure to stay tuned for new API improvements in the upcoming Sencha Test 2.0 GA. We hope that this release will make using multiple contexts even easier for you.


Latest Content

JS Days Is Back: A Free Virtual Conference for JavaScript Developers
Sencha is bringing back JS Days, a free, two-day online conference for JavaScript developers. Dates:…
July 2, 2026

What Is DORA? A Complete Guide to the EU's Digital Operational Resilience Act (2026)
Last Updated: June 2026 The Digital Operational Resilience Act (DORA) is one of the most…
June 17, 2026

Top 8 Best Practices for Enterprise Software Development in 2026
Enterprise software development in 2026 demands a different approach than consumer application development. Enterprise teams…
June 3, 2026


