






Creating a Mobile Application with Ext JS and Capacitor
May 26, 2026
9198 Views
Get a summary of this article:
Introduction
Modern mobile applications demand rich user experiences, cross-platform compatibility, and rapid development cycles. In this document, you will learn how Ext JS and Capacitor can be combined to create powerful enterprise-grade mobile applications using web technologies. Ext JS provides you with a comprehensive framework for building responsive and feature-rich user interfaces, while Capacitor allows your applications to run seamlessly on iOS and Android devices by connecting web applications with native mobile functionality.
Software Requirements
Before getting started, ensure your development environment has the following tools installed and configured:
- Node.js and npm: Required for package management and to run the Capacitor CLI.
- A working Ext JS Project in Modern Toolkit: You will need a compiled version of your application (either a testing or production build) ready to be wrapped.
- Capacitor CLI & Core: Required within your project to bridge your web application with native platforms.
- Android Studio: Required to build, run, and emulate the Android version of your application.
- (Note: Android Studio automatically bundles and manages Gradle via the Gradle Wrapper, so a separate global installation is not necessary).

Have a working Ext JS project
For the best mobile experience with Capacitor, it is highly recommended that your Ext JS project uses the Modern toolkit, as it is specifically optimized for touch devices, fluid layouts, and mobile performance.
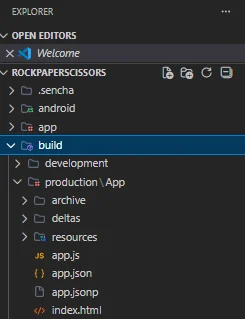
Before integrating Capacitor, you must have a compiled version of your application ready. You need to generate either a testing or production build to ensure all your assets and code are properly minified and packaged.
Make sure you have run the build command at least once in your project directory:
sencha app build production or sencha app build testing

Install Capacitor in your project
Capacitor is installed as a local dependency on a per-project basis. You can choose to install and initialize Capacitor directly in the root folder of your Ext JS project, or inside a dedicated subfolder (e.g., mobile-app/) if you prefer to keep your native mobile configuration strictly separated from your web workspace.
Follow these steps to initialize and install Capacitor in your chosen directory:
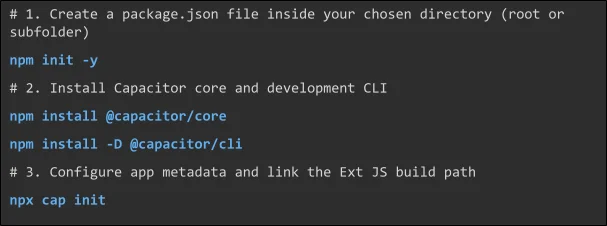
Initialize npm
Navigate to your chosen directory (root or your new subfolder) in your terminal.
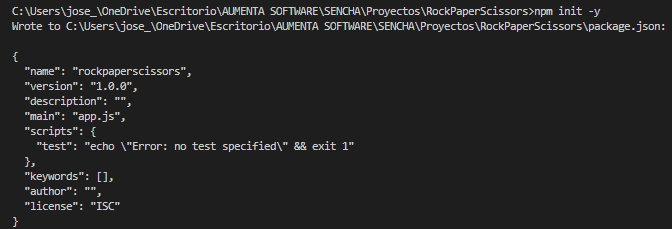
Execute npm init -y to create a package.json file (which is mandatory to use Capacitor) in the directory of the ext js project.

Install Capacitor
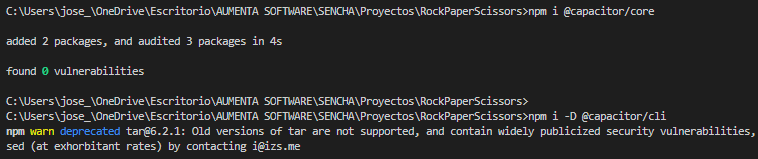
Install the core runtime and the command-line interface (CLI) as dependencies using the commands npm i @capacitor/core, npm i -D @capacitor/cli

Creating a Capacitor project
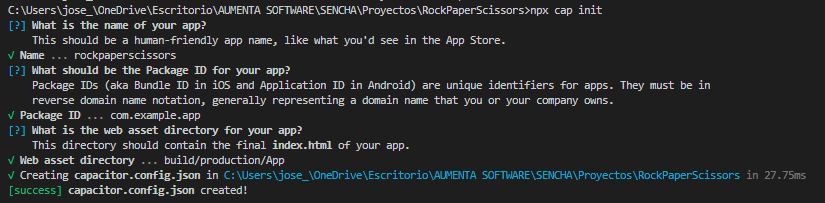
Create a capacitor project using npx cap init. You will need to add the name and package id for the app. Additionally, you must specify the testing or production build directory from the Ext JS project as the Web asset directory.
- App Name: Your App Name
- Package ID: com.company.appname
- Web Asset Directory: CRITICAL STEP. You must point this to the compiled output directory of your Ext JS application.
- If you installed Capacitor in the root folder, this is typically: build/production/YourAppName
- If you installed Capacitor in a subfolder, remember to use a relative path pointing back to the root: ../build/production/YourAppName

Command Summary

Android Project
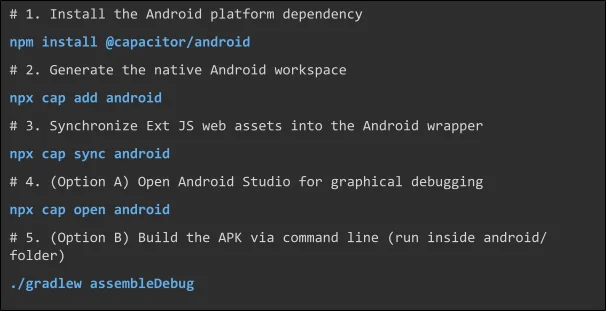
Once Capacitor is initialized in your project, the next step is to add the Android platform, synchronize your Ext JS web assets into the native wrapper, and build the application.
Install android platform package
In the same directory where you initialized Capacitor (root or subfolder), install the Capacitor Android package as a dependency with npm i @capacitor/android


Create android project
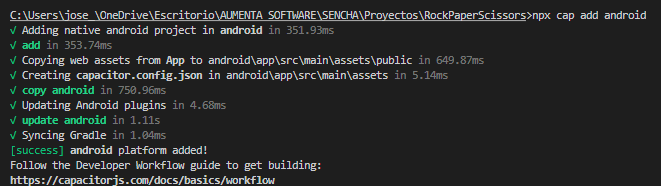
Generate the native Android project structure by running npx cap add android
This command creates an android/ directory containing all the necessary native Java/Kotlin files, Gradle configurations, and Android manifests.

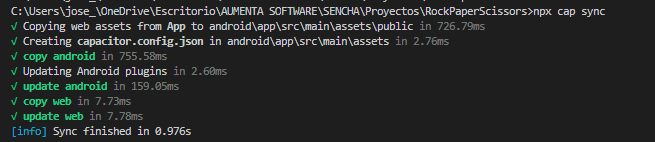
Sync project (copies from production to mobile app)
Whenever you make changes to your Ext JS code and run a new production build, you must copy those updated web assets into the native Android project. Do this by running npx cap sync

Build and Run the Application
You have two primary options for compiling and testing your Android application: using the Android Studio graphical interface or using the Gradle command line.
Option A: Open in android studio
Open the project in android studio with npx cap open android, Android Studio will check the android project and add missing files if needed. Note: First run might prompt to create a local.properties file, Android Studio does this automatically.


Wait until the project is fully loaded in Android Studio.


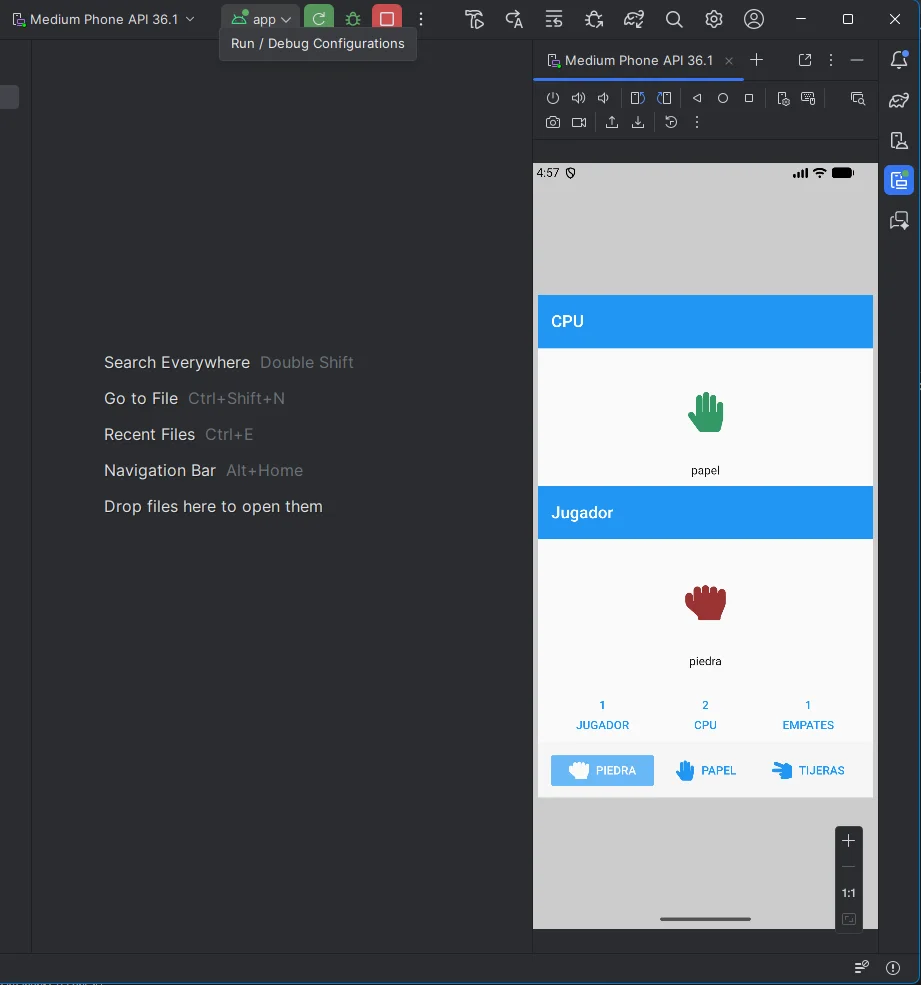
Once loaded, you can run the app using the play button in android studio

Option B: Use Gradle to export instead of android studio
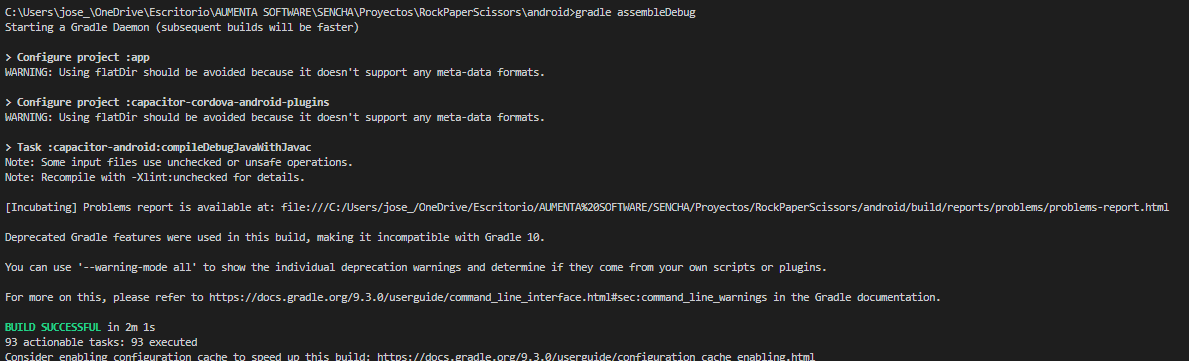
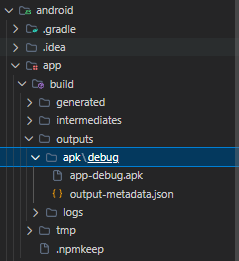
If you don’t want to use android studio, you can export the APK using Gradle in the command line, go to the directory android/, then run the command gradle assembleDebug to build the mobile app. The apk is generated in the path android>app>build>outputs>apk>debug>app-debug.apk


Command Summary

Configuring Native Permissions (Camera, Files, etc.)
By default, newly generated Android and iOS projects do not have permissions to access sensitive device hardware like the Camera, GPS, or Photo Library. If your Ext JS application requires these features, you must declare them in the native configuration files of each platform; otherwise, the operating system will crash your application for security reasons.
For Android (AndroidManifest.xml)
Open the file located at android/app/src/main/AndroidManifest.xml. You need to add the <uses-permission> tags inside the <manifest> block, typically right before the <application> tag.
Daily Development Workflow
To apply changes every time you modify your Ext JS code, follow this order:
- sencha app build production (Rebuild web assets)
- npx cap sync (Update native project)
- Click Play in Android Studio again (or run gradle again).
Documentation: https://capacitorjs.com/docs/android
iOS Project
Note: To build, run, and deploy iOS applications, you must be working on a macOS machine with Xcode installed.
Install iOS project
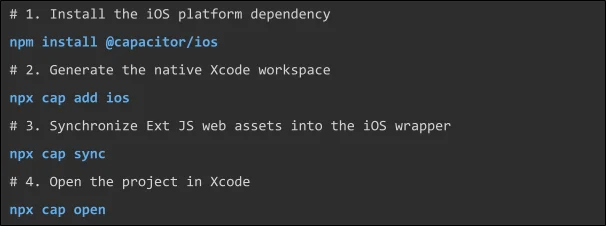
In the same directory where you initialized Capacitor, install the iOS package as a dependency with npm i @capacitor/ios
Create iOS project
Create the iOS project with npx cap add ios
Build, Debug, and Run
Sync the web code to the native project with npx cap sync
Debug/create
Open the project in Xcode with npx cap open ios.
To run the project on a device or simulator you can use npx cap run ios
Command summary

Configuring Native Permissions (Camera, Files, etc.)
By default, newly generated Android and iOS projects do not have permissions to access sensitive device hardware like the Camera, GPS, or Photo Library. If your Ext JS application requires these features, you must declare them in the native configuration files of each platform; otherwise, the operating system will crash your application for security reasons.
For iOS (Info.plist)
Apple requires not only permission but also a human-readable explanation of why you need it (this text is shown to the user in the prompt). Open the project in Xcode, or directly edit the file located at ios/App/App/Info.plist.
Daily Development Workflow
To apply changes every time you modify your Ext JS code, follow this order:
- sencha app build production (Rebuild web assets)
- Sync project: npx cap sync
- Open in Xcode: npx cap open ios (Open in Xcode, then use the Play button ~~in Xcode~~ to run on Simulator/Device).
Documentation: https://capacitorjs.com/docs/ios
Troubleshooting
1. Changes Not Reflecting in the Exported App
Symptom: You made changes to your Ext JS code, exported a new APK or IPA, but the mobile app still shows the old version.
Solution: Capacitor does not automatically watch or compile your web code. You must explicitly run your framework’s build command (sencha app build production) before running npx cap sync. If you skip the sync command, the native project will export using outdated web assets.
2. Package Version Mismatches
Symptom: Running npx cap sync or attempting to build in Android Studio/Xcode throws dependency errors or complains about mismatched Capacitor plugins.
Solution: All Capacitor core packages must be on the exact same major version. Open your package.json and ensure capacitor/core, @capacitor/cli, @capacitor/android, and @capacitor/ios all share the same major version number (e.g., all ^5.0.0 or all ^6.0.0). Delete your node_modules folder and run npm install again if you make changes.
3. The Exported App Crashes Instantly on Hardware Access
Symptom: The APK or IPA exports successfully and installs on the device, but completely crashes/closes as soon as you trigger the camera, QR scanner, or file upload.
Solution: Missing native permissions. Exporting the web code is not enough; you must explicitly declare hardware usage in the native configuration files before compiling. Add the necessary <uses-permission> tags in android/app/src/main/AndroidManifest.xml or the specific usage descriptions in ios/App/App/Info.plist.
4. Gradle Sync Hangs or Fails on First Open
Symptom: After running npx cap open android, Android Studio gets stuck loading or complains about a missing SDK path.
Solution: On the very first run, Android Studio needs to generate a local.properties file to locate your Android SDK, and download the required Gradle version. Ensure you have an active internet connection, accept any SDK license prompts that appear in the bottom right corner of the IDE, and let the background Gradle sync finish completely before attempting to generate an APK.
5. Command Line Builds Fail (Missing SDK CLI Tools)
Symptom: When trying to run the app via the terminal (using npx cap run android or Gradle commands), the build fails with errors stating that the “SDK tools are missing,” “licenses are not accepted,” or a specific command cannot be found, even though Android Studio is installed.
Solution: You are missing the Android SDK Command-line Tools. Open Android Studio, go to the top menu and select Tools > SDK Manager. Click on the SDK Tools tab in the middle of the window. Find “Android SDK Command-line Tools (latest)” in the list, check the box next to it, and click Apply to download and install them. Once installed, restart your terminal and try again.
FAQ
Q: Can I compile and export an iOS app (.ipa) directly from my Windows 11 machine?
A: No. Apple strictly requires macOS and Xcode to compile, sign, and export iOS binaries. You can write your Ext JS code, add the @capacitor/ios platform, and run npx cap sync on a Windows machine, but to generate the actual .ipa file or emulate the app, you must transfer the project to a Mac.
Q: Does Capacitor replace Cordova?
A: It is not a direct substitute, but rather a more modern alternative. While both tools allow you to build cross-platform mobile apps using web technologies, Capacitor was designed from the ground up to offer a more modern development experience. It provides easier access to native device SDKs, better performance, and allows you to treat your Android and iOS projects as actual source code rather than hidden build artifacts.
Q: Do I need to manually download and install Gradle to export Android apps?
A: No. Capacitor and Android Studio utilize the Gradle Wrapper. When you run the project, it automatically downloads and uses the exact version of Gradle required for the build.
Q: How do I export an Android APK from the command line without opening Android Studio?
A: You can use the included Gradle Wrapper to run a headless build directly from your terminal. Navigate into the native Android directory (cd android/) and execute the build command using the Windows batch file: .\gradlew.bat assembleDebug. The compiled APK will be output to android\app\build\outputs\apk\debug\.
Q: Do I need to run npm install inside the android/ or ios/ folders?
A: Never. Capacitor handles all native dependency management automatically. You only run npm install in your root web project folder. When you execute npx cap sync, Capacitor updates CocoaPods (for iOS) and Gradle (for Android) for you behind the scenes.


Hybrid Mobile Apps
Capacitor
Cross-Platform Development
Mobile App Development
Enterprise Applications
Frontend Development
Web Development
JavaScript Frameworks
UI/UX Development
Ext JS



Latest Content


Async/await with Ext JS
Probably one of the most appreciated features of the latest versions of JavaScript is Promises,…
September 3, 2026
Sencha IDE Plugins - JetBrains 6.0.18 Is Here
JetBrains 2026.2 just shipped. So did we. Sencha’s JetBrains plugin is an Integrated Development Environment…
September 2, 2026
MVP Developer Series 1.1 - Responsive layout in Ext JS
Ext JS provides several tools for building a responsive layout. A video was recently published…
August 24, 2026