



 Ask Sencha AI
How To Call Google API Detect Label With Ext JS And Sencha Architect
April 20, 2021
3478 Views
Get a summary of this article:
Detect Labels is one of the most awesome Google APIs out there, no matter how you look at it. It is the entry point to a vast array of data that can be added to any image. It can read tags for almost anything you see in an image, from its location to the products and activities you see within. Is there a picture of an animal in there? You can even tag the species if the answer is yes. Without a doubt, the Detect Label API. has limitless potential. That is why, today, we will create a project in Sencha Architect using best practices and Detect Labels to scan images. You can also use D3 Heat Map to let the Google API detect the labels and quickly build sophisticated web applications by dragging and dropping premium components on the Architect design pane.
Starting with Sencha Architect
Before you start, you are going to need to configure and open Sencha Architect on your machine. If it asks for them, install and update Sencha CMD and the Ext JS SDK as well.
How can I create a project?
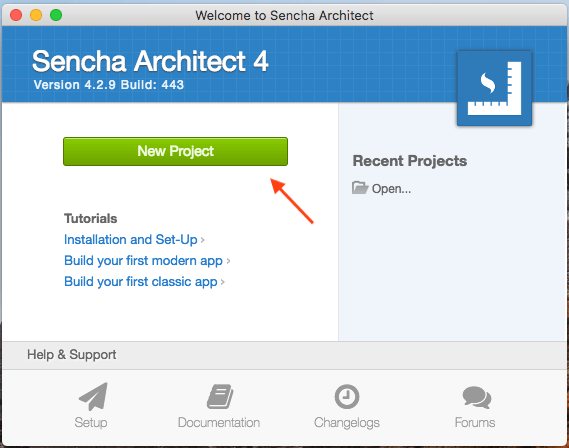
Once everything is current, you can start by clicking on New Project on the Sencha Architect main screen:
You will see a number of project options, for our purposes we will start with the Blank Project template. Select it and click on Create:
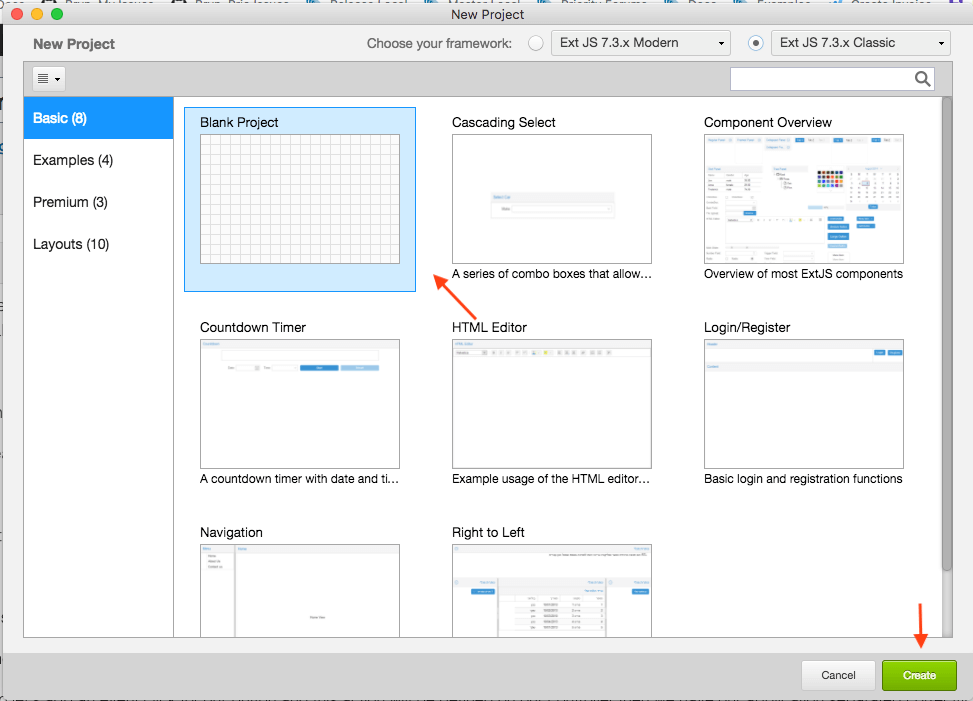
This creates a new blank project ready for you to start selecting and dragging things into.
How can I create and configure the view?
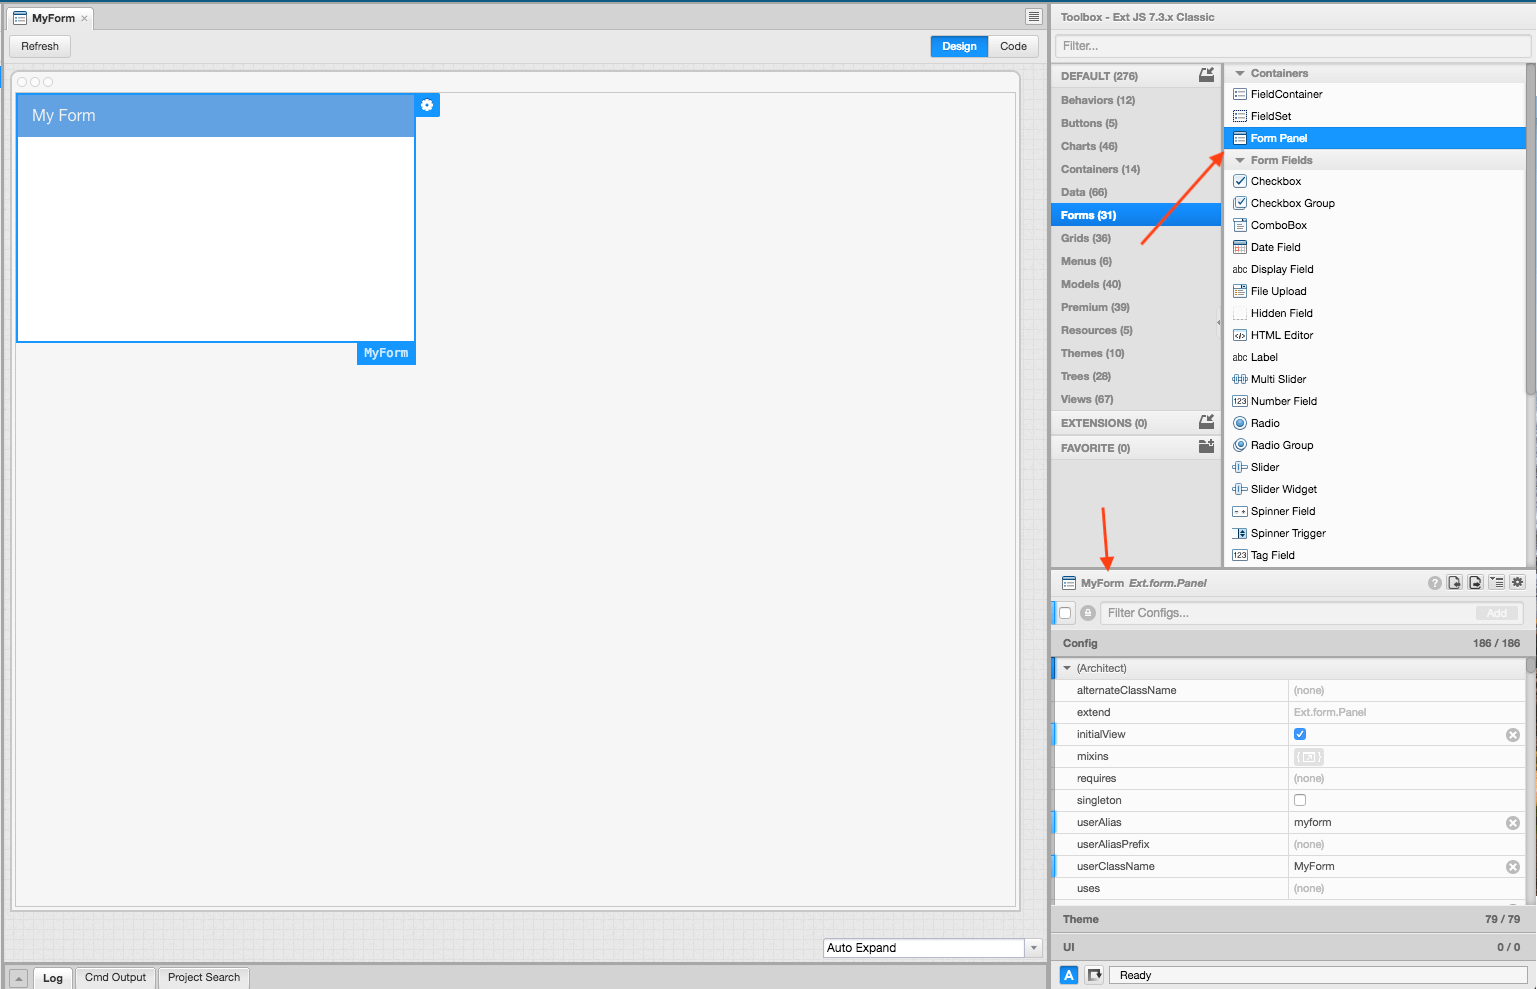
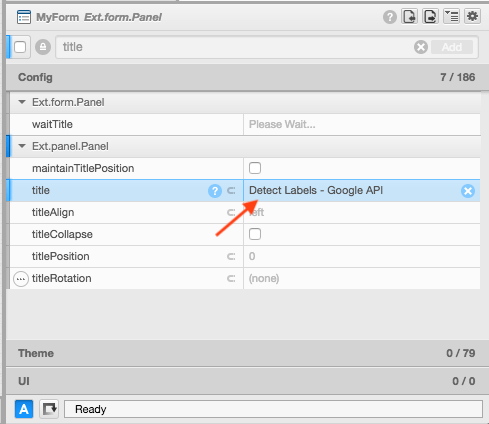
The first thing you want to do is select and drag a Form Panel from the right-side tool box. Drag it into your project and give it a title in the configurations panel on the bottom right of the Sencha Architect window. Let’s name it Detect Labels:
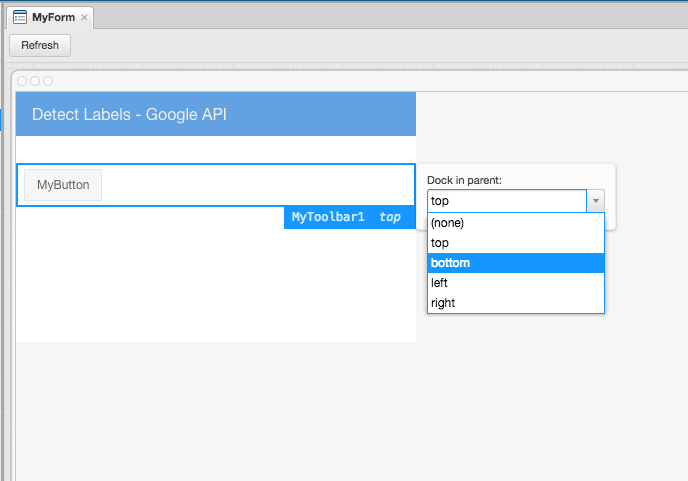
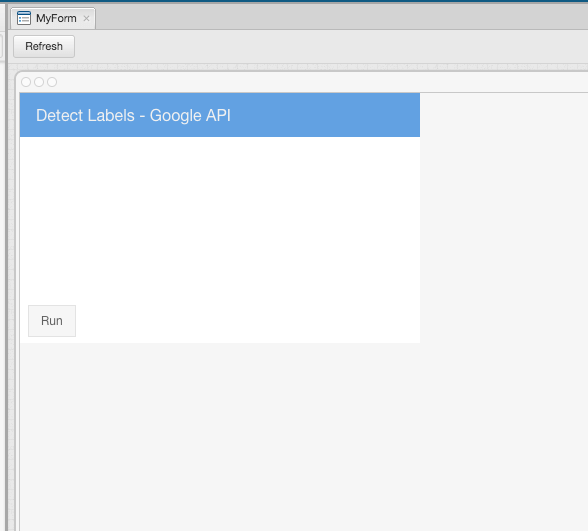
Next, you will want to add a toolbar with a button at the bottom of the form. Call the button Run. We can assign the button an action later.
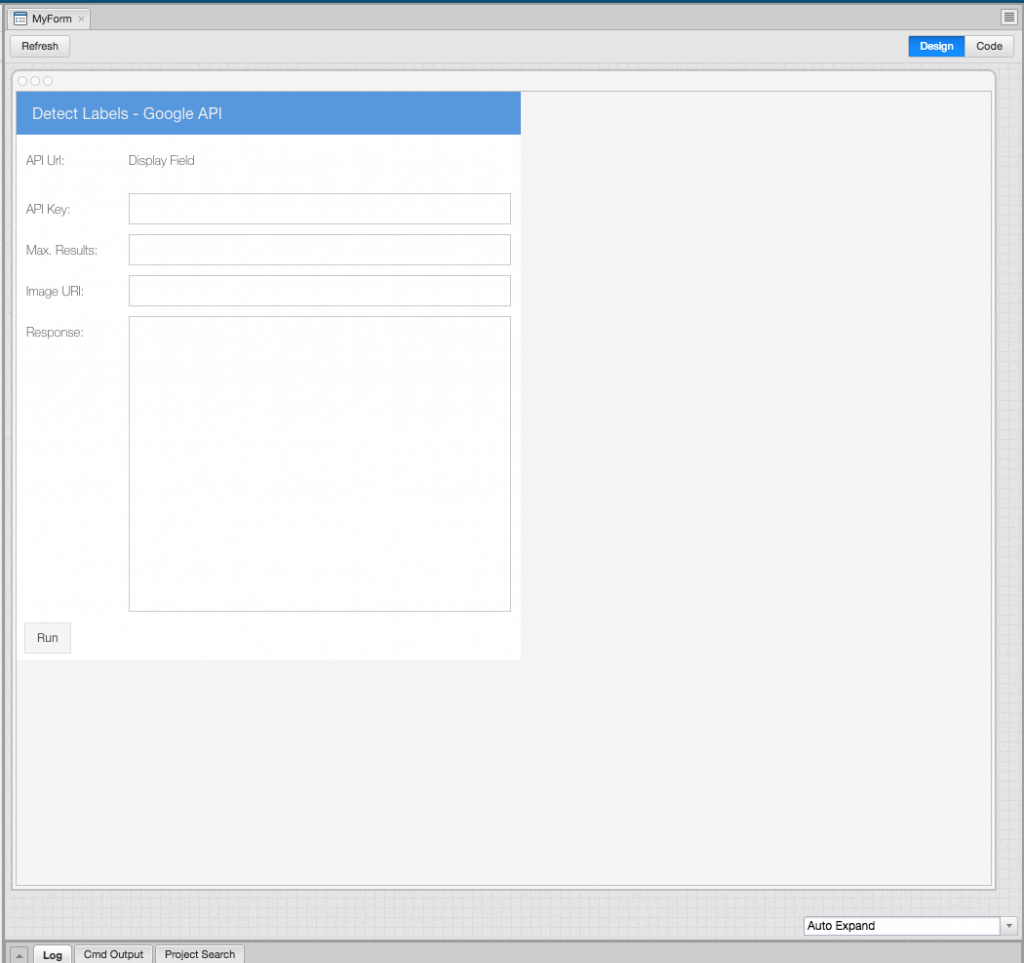
Now it gets interesting, let’s add some fields that we will use to dynamically change our request parameters. You can rename them as you go by double-clicking on the name field. Add fields for API URL, API Key, Max. Results, Image URL, and Response.
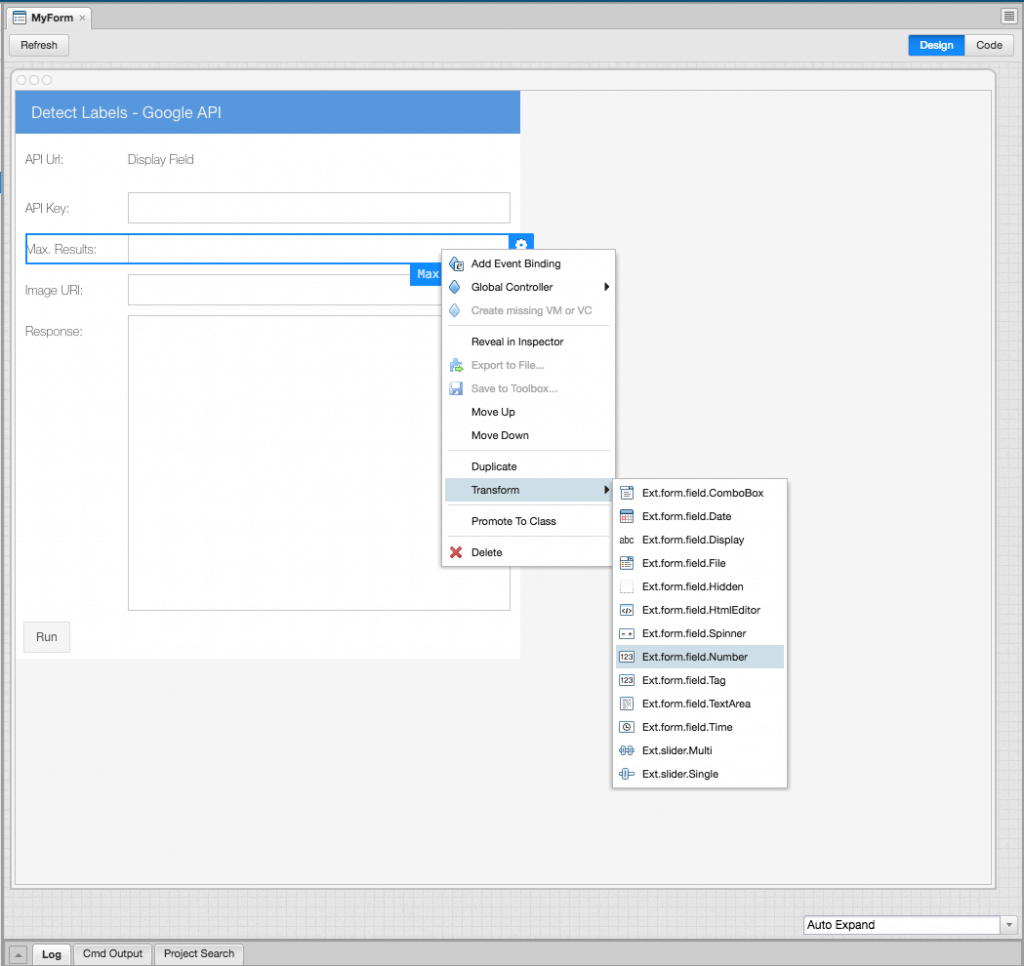
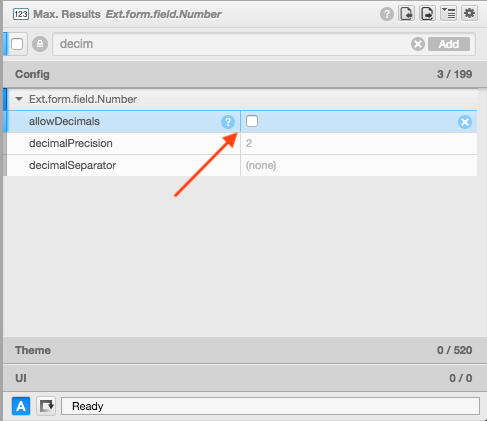
Now, let’s transform the Max. Results field to a Number field and disable the decimal flag because there will be an integer value for it.
How can I Configure the View Model?
Now that you have created your view, it is time to work on the View Model. Here we connect the fields with values from the model using bind. To do this go to the tree files on the left panel, and select MyFormViewModel. Next, in the configuration panel, find config data and click on its value. This will change it in the code.
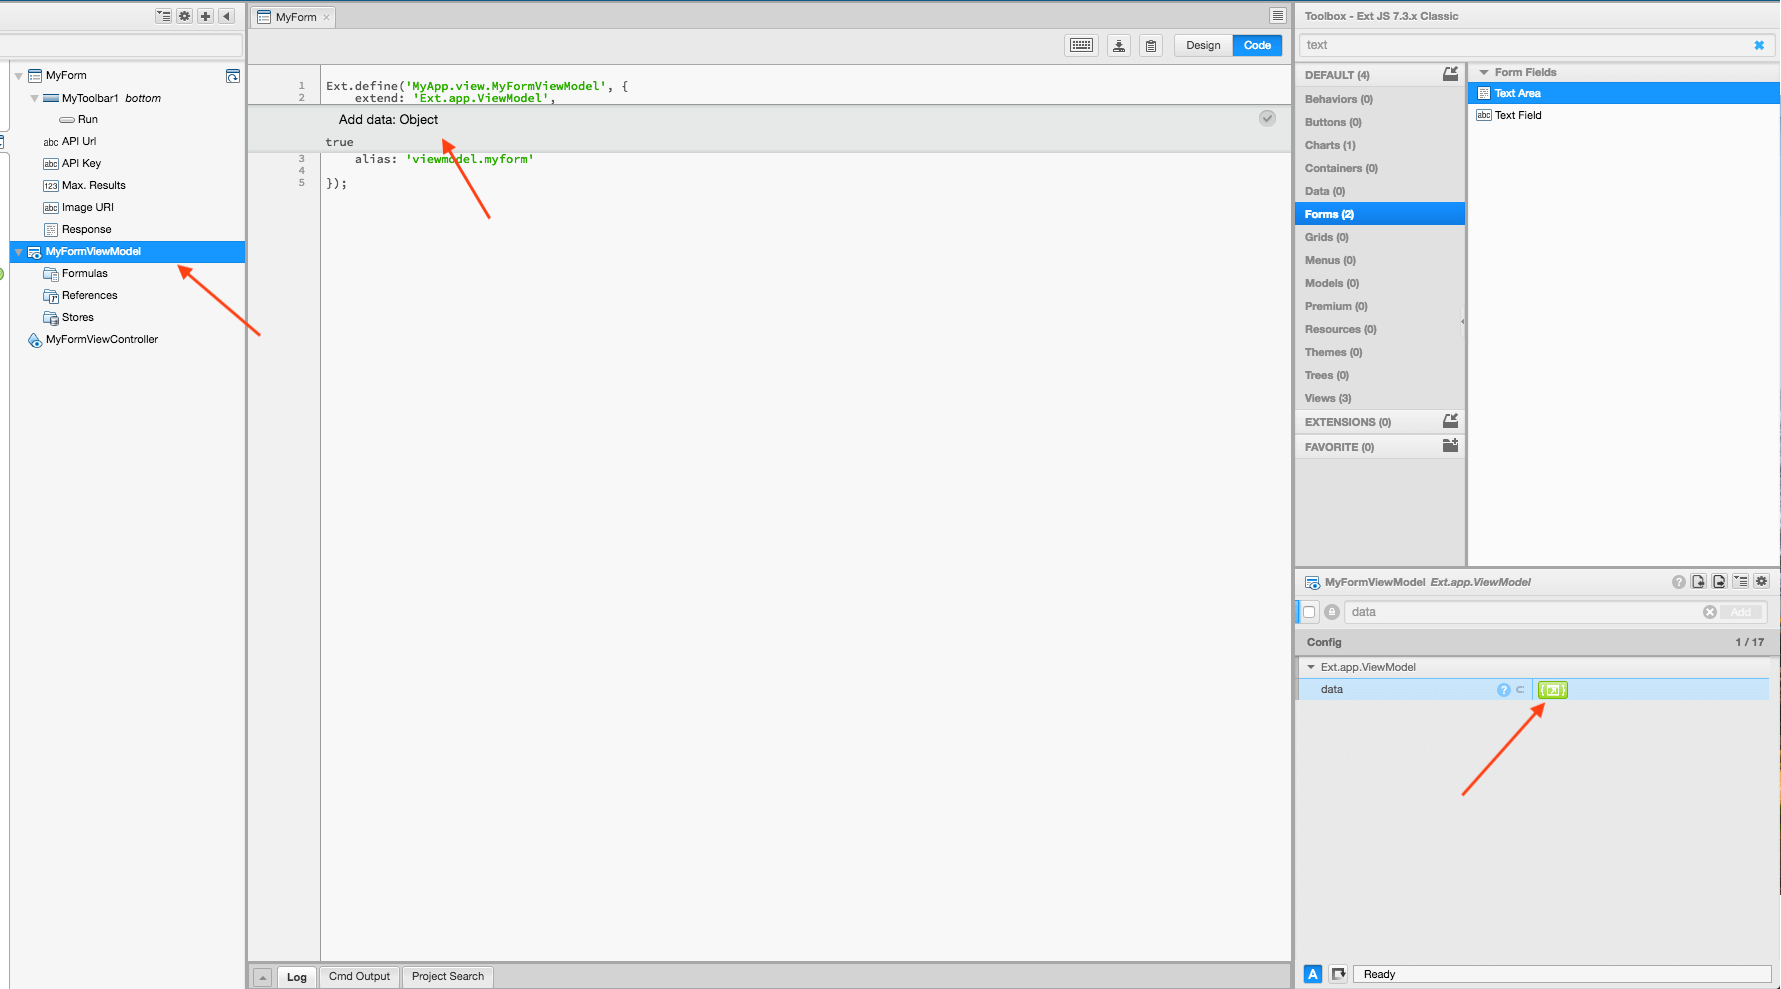
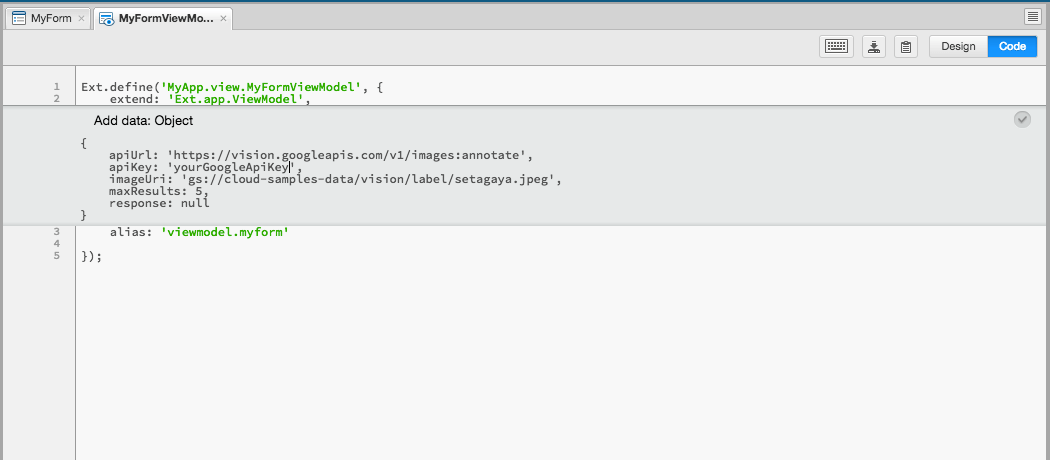
This will also open the Architect code editor. To define the data for the view model we will enter our URL and parameters to call the Detect Labels API using an Ext Ajax request. As an example, we will use the image used on the API blog post. Don’t forget to change your Google API Key key as well!
data: {
    apiUrl: 'https://vision.googleapis.com/v1/images:annotate',
    apiKey: 'yourGoogleApiKey',
    imageUri: 'gs://cloud-samples-data/vision/label/setagaya.jpeg',
    maxResults: 5,
    response: null
}
How can I Bind the fields?
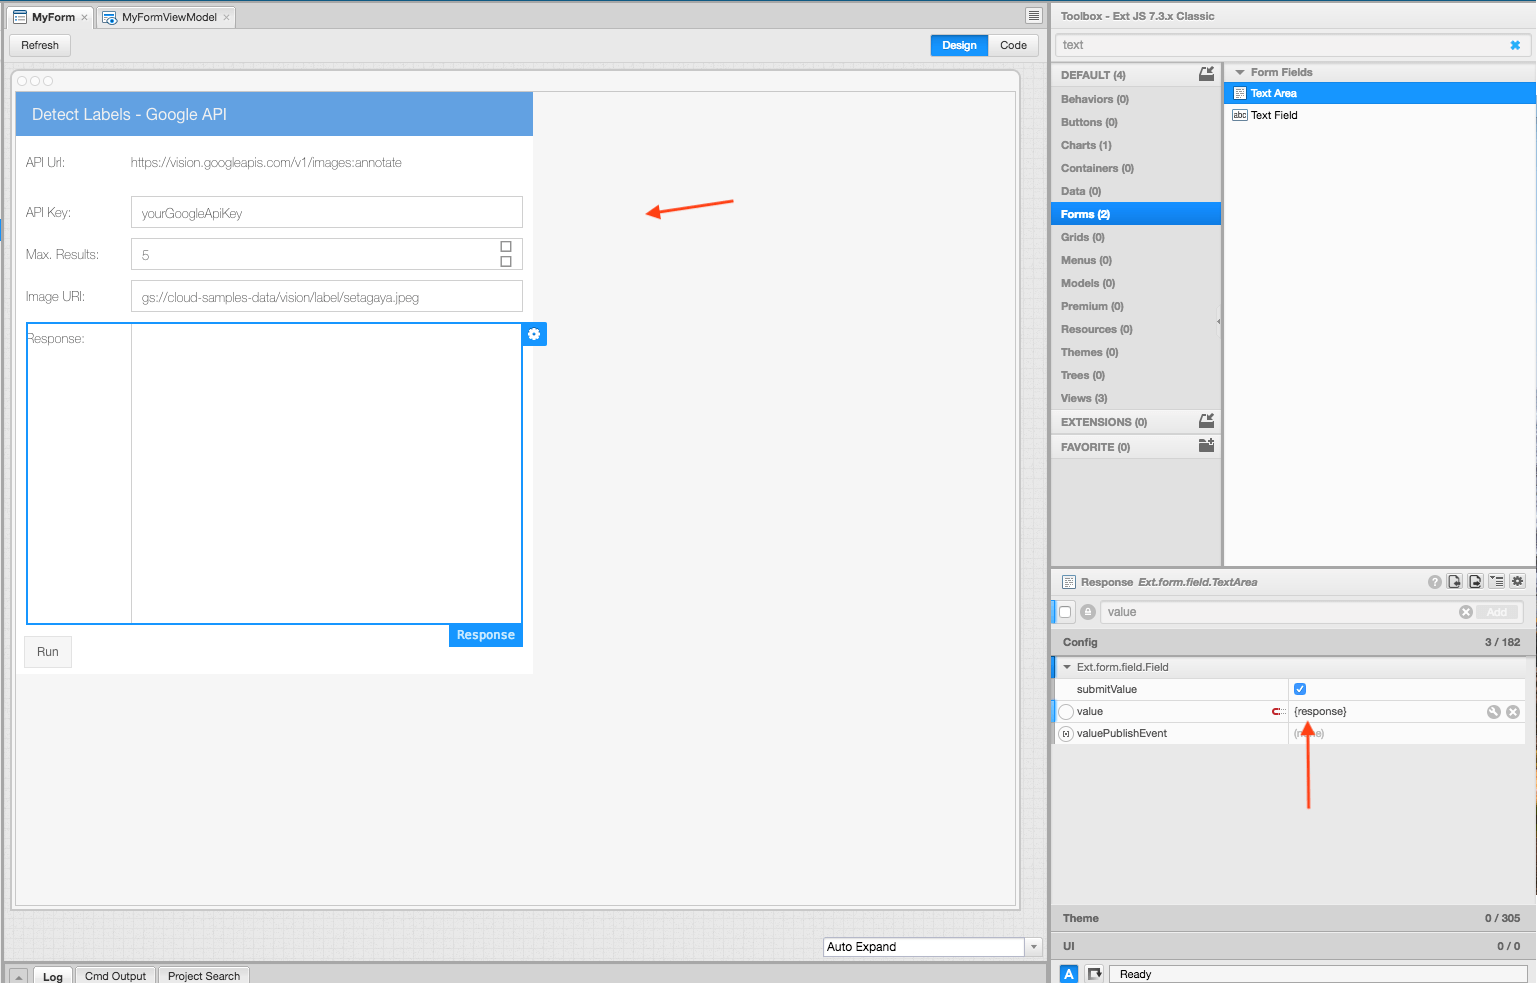
Once you are done, it is time to connect the data to our fields. To do this, head back to your form view on the Editor tab, select each field, and find the value property on the configurations panel. Make sure the option View Model Binding is enabled for all fields:
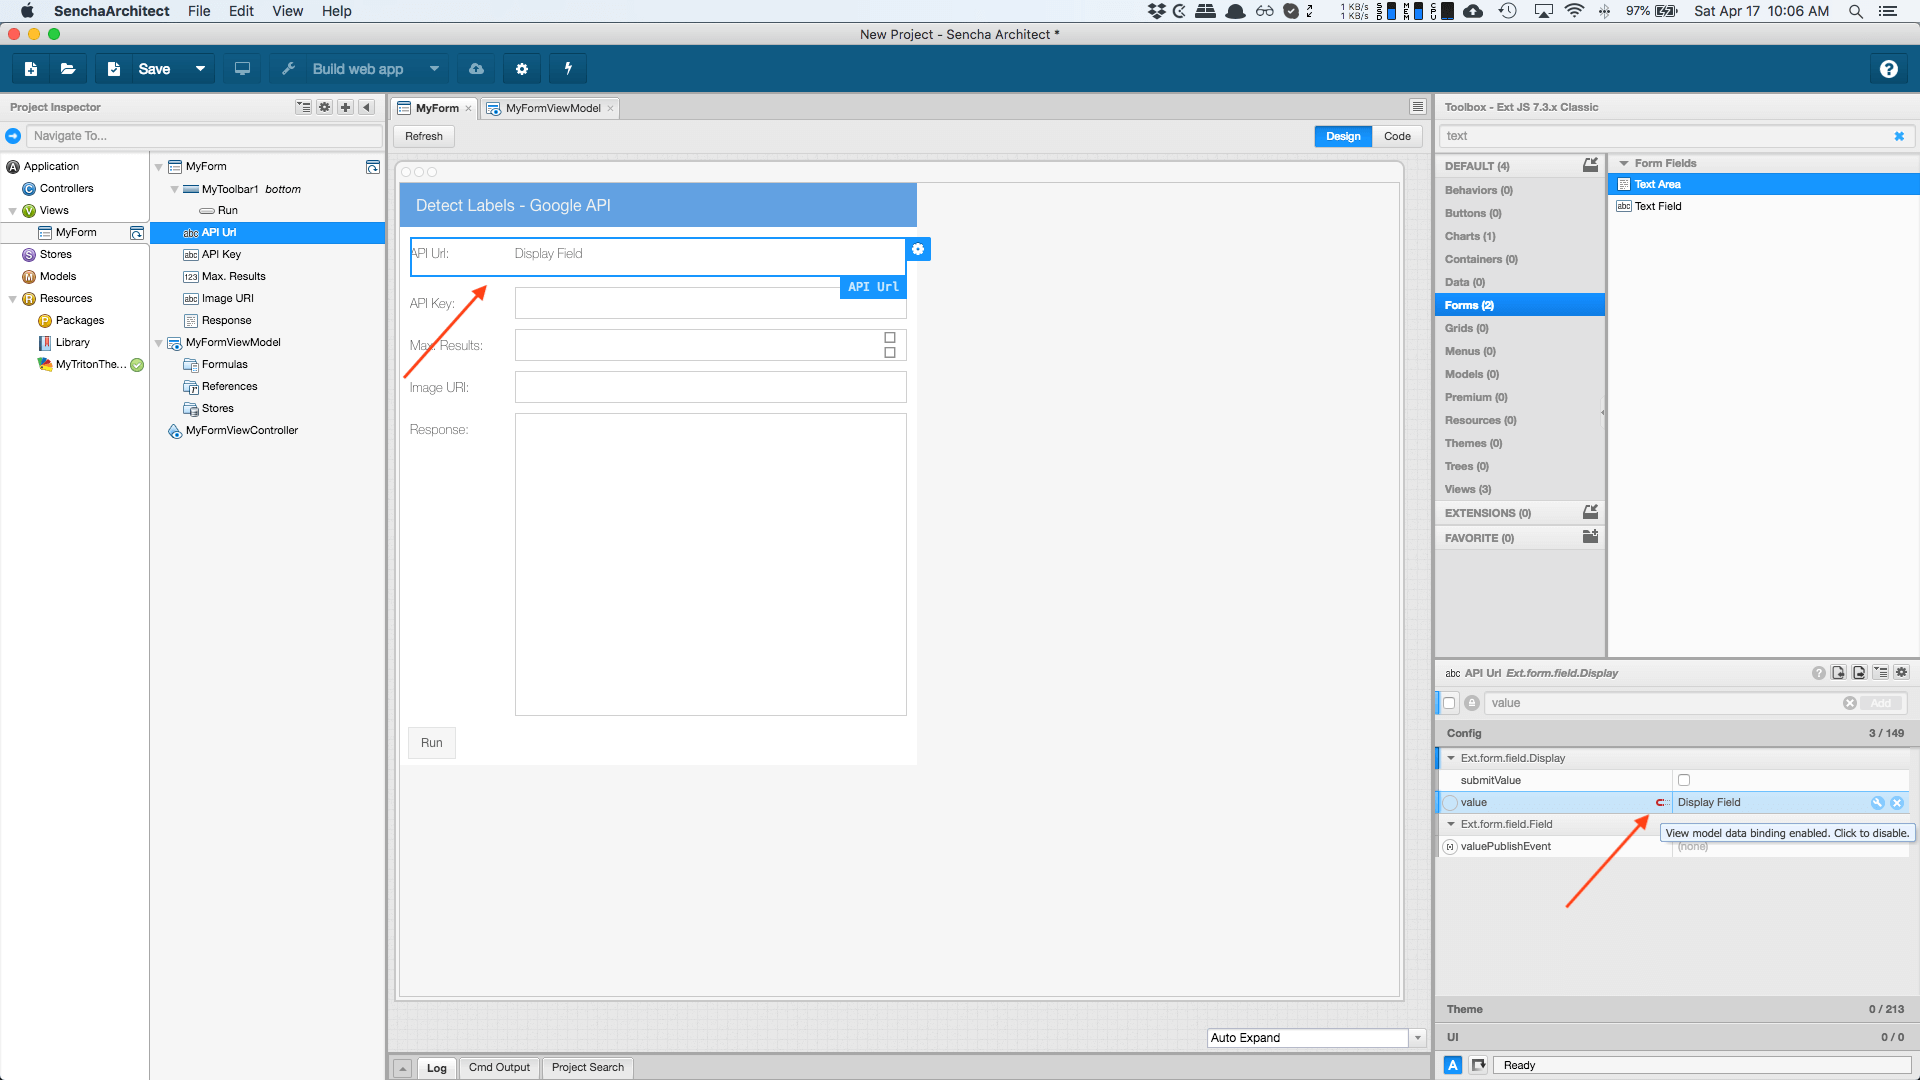
For each value, define the property value for each field between the brackets {}. Here you will link to properties we defined earlier in the view model. This way, your fields will automatically show these values. Remember to link to the response field to ensure your response displays correctly once we implement it in the next steps.
What about Working on the View Controller?
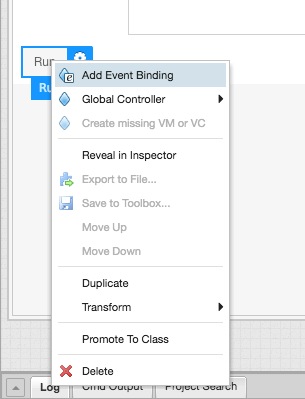
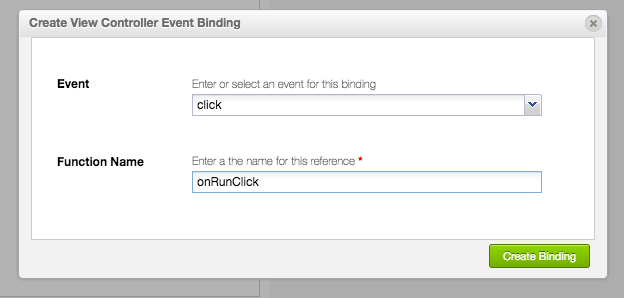
Now all that is set up, it is time to add an action to the app. To do this add an add an Event Binding for our Run button with its value set to click. For this, on your Run button, right-click with your mouse to show the context menu and click on the option Add Event Binding. Select the event click and change the function name to onRunClick. As to complete the action click on Create Binding to create the function on our View Controller:
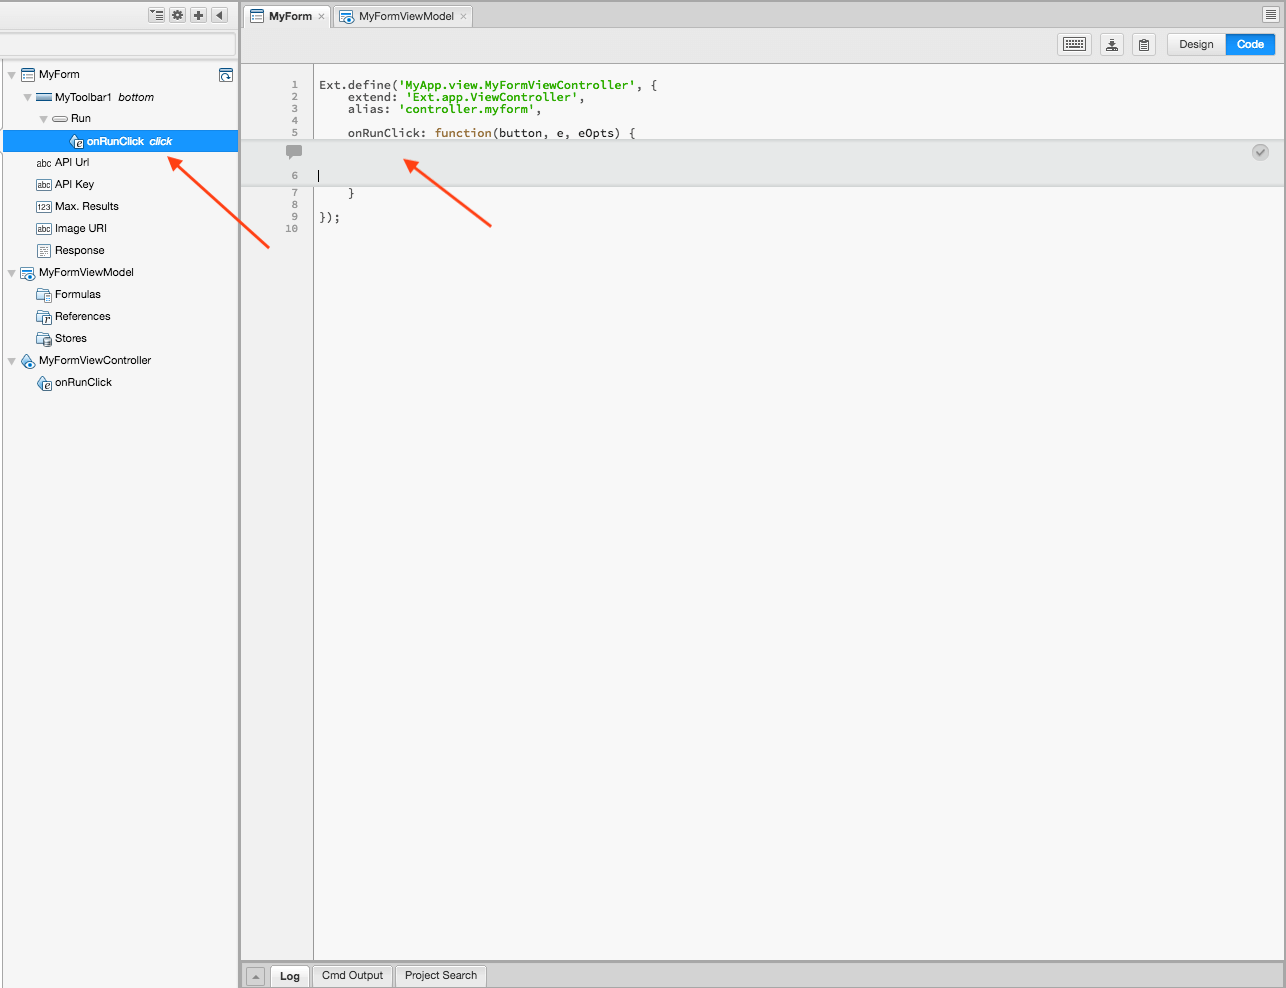
Now go to the left menu, select your newly-added onRunClick function created to edit the function code content for your Run button. Here is where we add the code that will call our Ajax Request with all values from our form. For reference, the code is in the code block below:
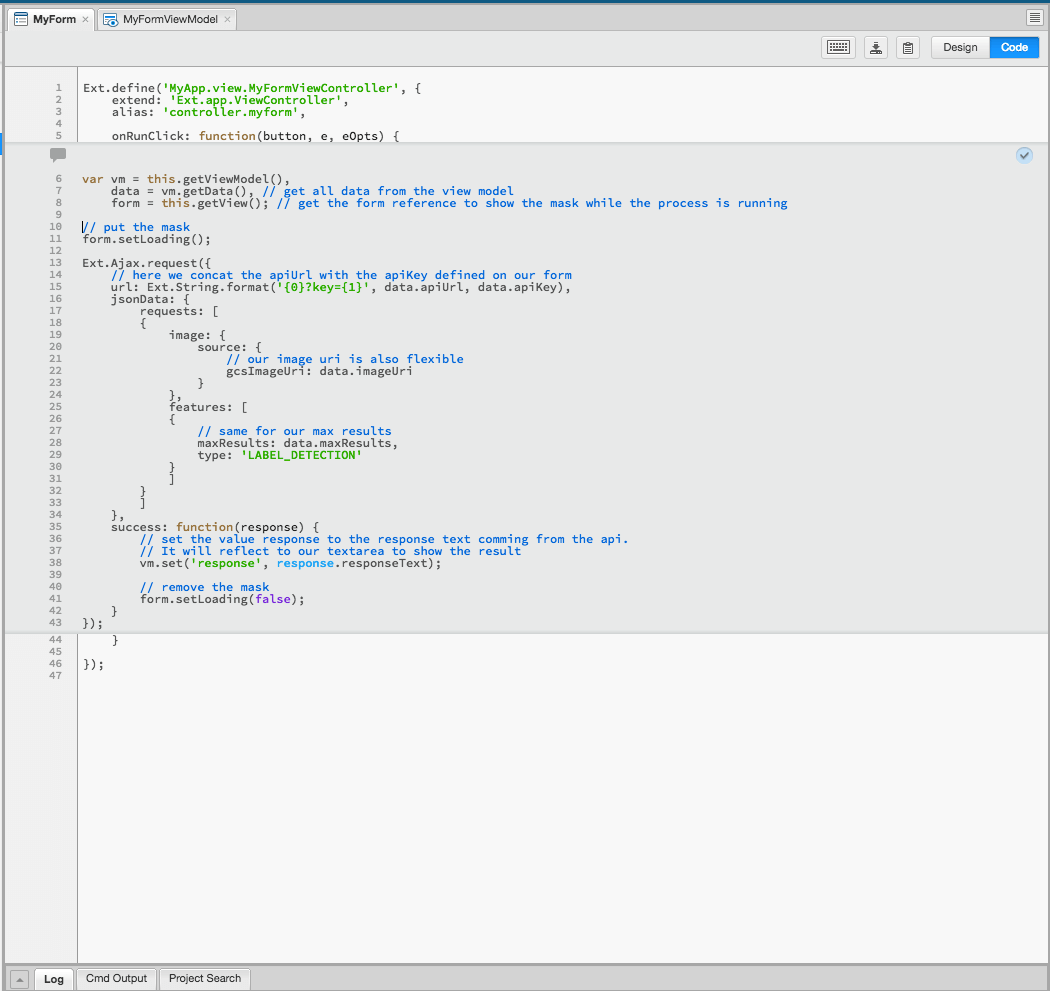
var vm = this.getViewModel(),
    data = vm.getData(), // get all data from the view model
    form = this.getView(); // get the form reference to show the mask while the process is running

// put the mask
form.setLoading();

Ext.Ajax.request({
    // here we concat the apiUrl with the apiKey defined on our form
    url: Ext.String.format('{0}?key={1}', data.apiUrl, data.apiKey),
    jsonData: {
        requests: [
            {
                image: {
                    source: {
                        // our image uri is also flexible
                        gcsImageUri: data.imageUri
                    }
                },
                features: [
                    {
                        // same for our max results
                        maxResults: data.maxResults,
                        type: 'LABEL_DETECTION'
                    }
                ]
            }
        ]
    },
    success: function(response) {
        // set the value response to the response text comming from the api.
        // It will reflect to our textarea to show the result
        vm.set('response', response.responseText);

        // remove the mask
        form.setLoading(false);
    }
});
You can also use modern ES6+ Javascript code as best practice:
const
    vm = this.getViewModel(),
    data = vm.getData(), // get all data from the view model
    form = this.getView(), // get the form reference to show the mask while the process is running
    {
        apiUrl,
        apiKey,
        imageUri,
        maxResults
    } = data;

// put the mask
form.setLoading();

Ext.Ajax.request({
    // here we concat the apiUrl with the apiKey defined on our form
    url: `${apiUrl}?key=${apiKey}`,
    jsonData: {
        requests: [
            {
                image: {
                    source: {
                        // our image uri is also flexible
                        gcsImageUri: imageUri
                    }
                },
                features: [
                    {
                        // same for our max results
                        maxResults,
                        type: 'LABEL_DETECTION'
                    }
                ]
            }
        ]
    },
    success(response) {
        // set the value response to the response text comming from the api.
        // It will reflect to our textarea to show the result
        vm.set('response', response.responseText);

        // remove the mask
        form.setLoading(false);
    }
});
How do I run the application?
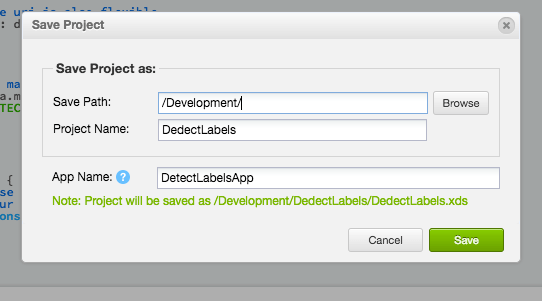
To run your new application, first you have to save your project and give it a name:
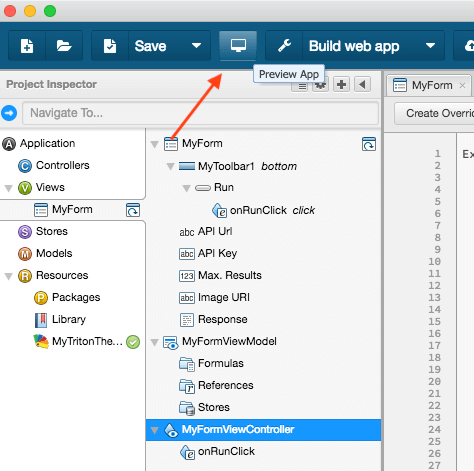
Now let’s try the app click on the Preview button and select Preview on the dialog to confirm it works:
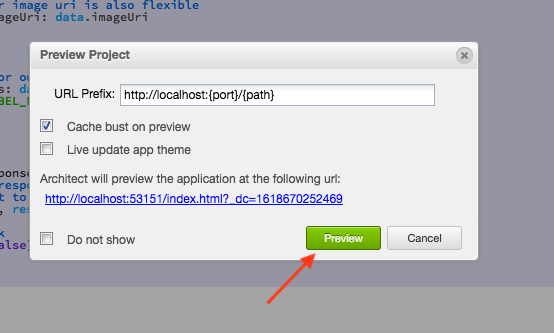
Once you have clicked Preview to run the app you can see our app running in the browser. Click on Run button to see all the information about the objects that the API found in the image in the Response field.
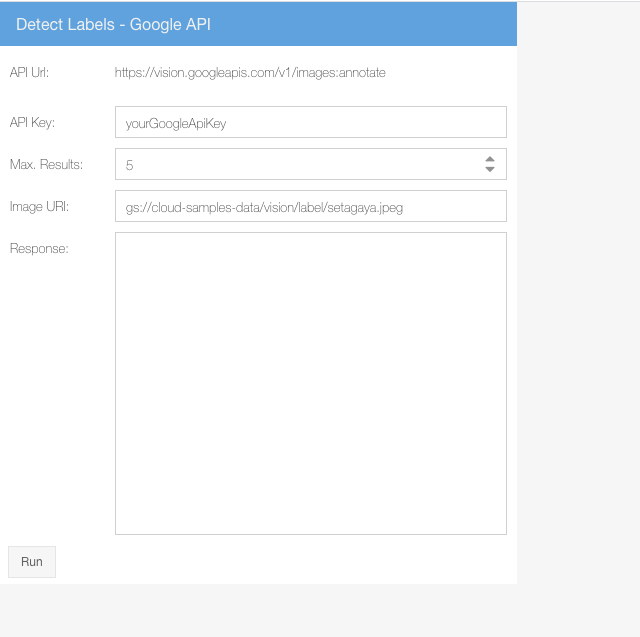
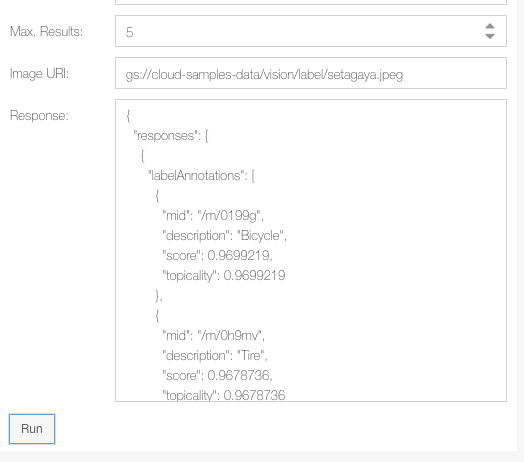
Pretty cool, right?
Are you ready to get started with the Google API?
With the same basic ideas we have explored here you can dive into calling any Google API with flexible parameters using Ext.Ajax.request!
Click here to see the source code on the repository.


Latest Content
How to Handle Millions of Rows in a React Data Grid: Buffered Rendering and Server-Side Data
A React data grid that feels instant with 1,000 rows can freeze with 100,000 and…
October 16, 2026
How to Choose a React Grid Component: 12 Features Enterprise Apps Need
Picking a React grid component looks easy in week one. Every option sorts columns and…
October 16, 2026
Enterprise React Data Grid: The Features Enterprise Teams Need, and What Each Grid Includes
Almost every enterprise React data grid advertises the same features: grouping, pivoting, Excel export, clipboard,…
October 16, 2026